Projects
The Projects Page serves as a central hub for managing the projects within the application. Users can navigate to the Projects page by clicking the "Projects" option in the left-side navigation bar where they can manage the projects.
Homepage
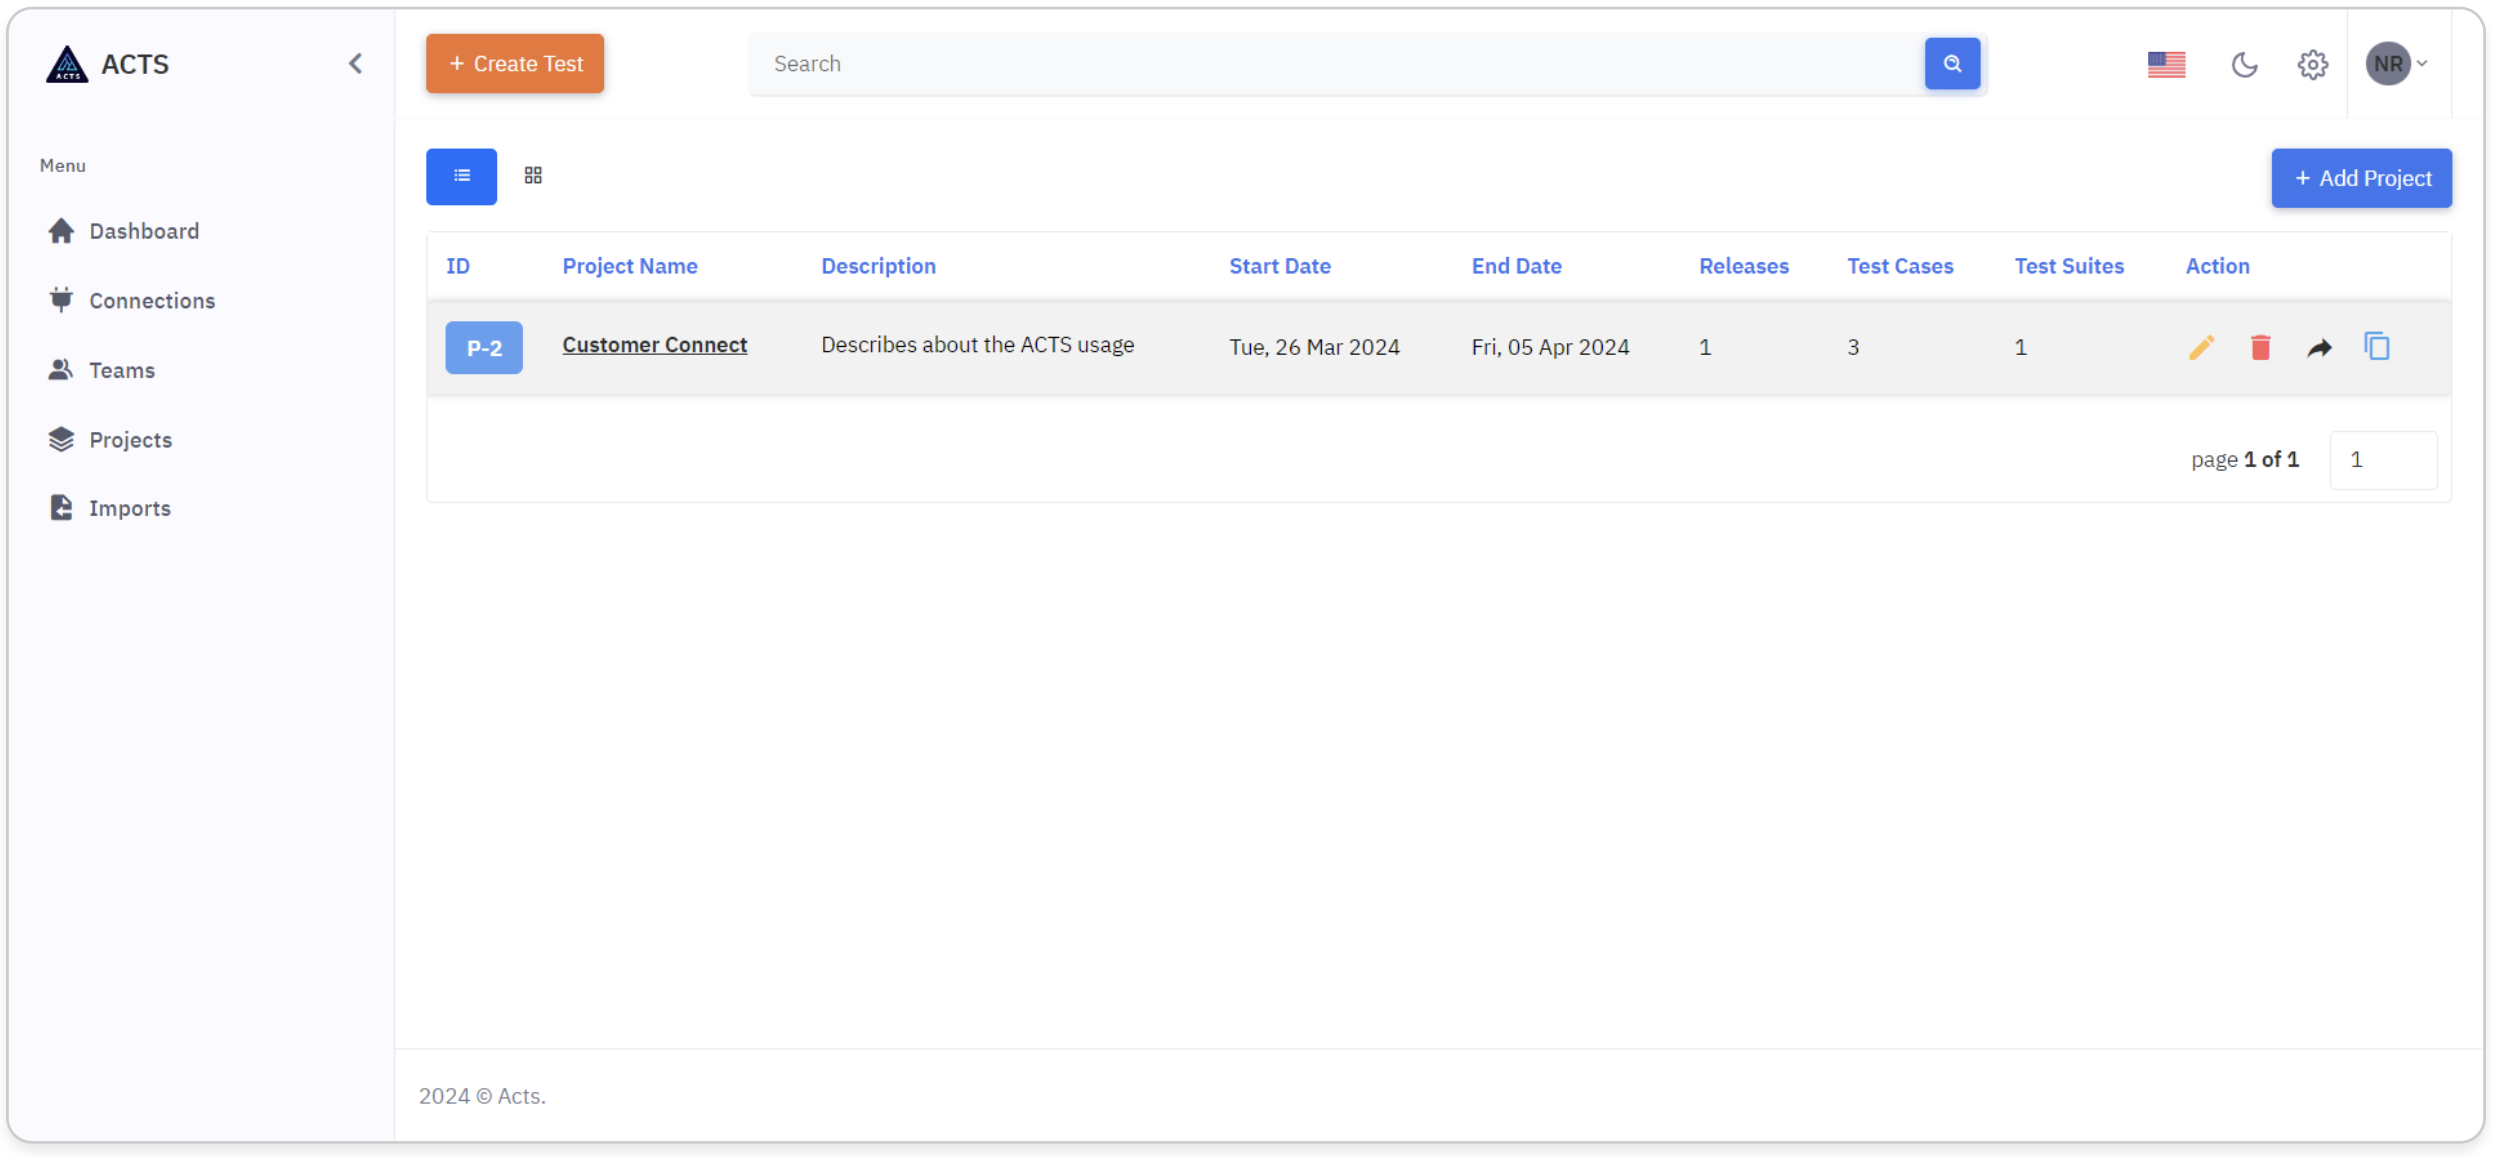
The "Add Project" button at the top right corner of the page enables the user to add a new project. The project details include ID, Name, Description, Start Date, End Date and the number of Releases, Test Cases, and Test Suites within the Project. The users can edit, delete, and share projects.

The image represents the home page of the Projects module, accessible via the projects icon in the side navigation bar. Here's a simplified guide to navigating this interface effectively:
Locate a Project
Begin by identifying the Projects icon positioned on the left navigation bar. This icon serves as the gateway to access the Projects module's home page.
Clicking on the Projects icon will seamlessly redirect users to the designated home page interface.
View a Project
Upon accessing the home page, users will encounter a comprehensive display showcasing the projects they've created.
Projects are presented in an organized manner, offering users the option to view them either in list view or grid view, based on their preference and workflow requirements.
The navigation tab and the list and grid views are shown in the image below:
List View
In the list view of the Projects module, users can see their created or assigned projects.
Each Project is represented by a unique ID.
Users can perform actions such as editing, deleting and sharing projects using the respective icons provided.
The sharing option provides the ability to share the project with different ACTS Teams.
Clicking on a project's name or ID redirects users to the Releases Page which displays the details of the Releases within the selected project.
This streamlined interface simplifies connection management and facilitates efficient integration within our application.
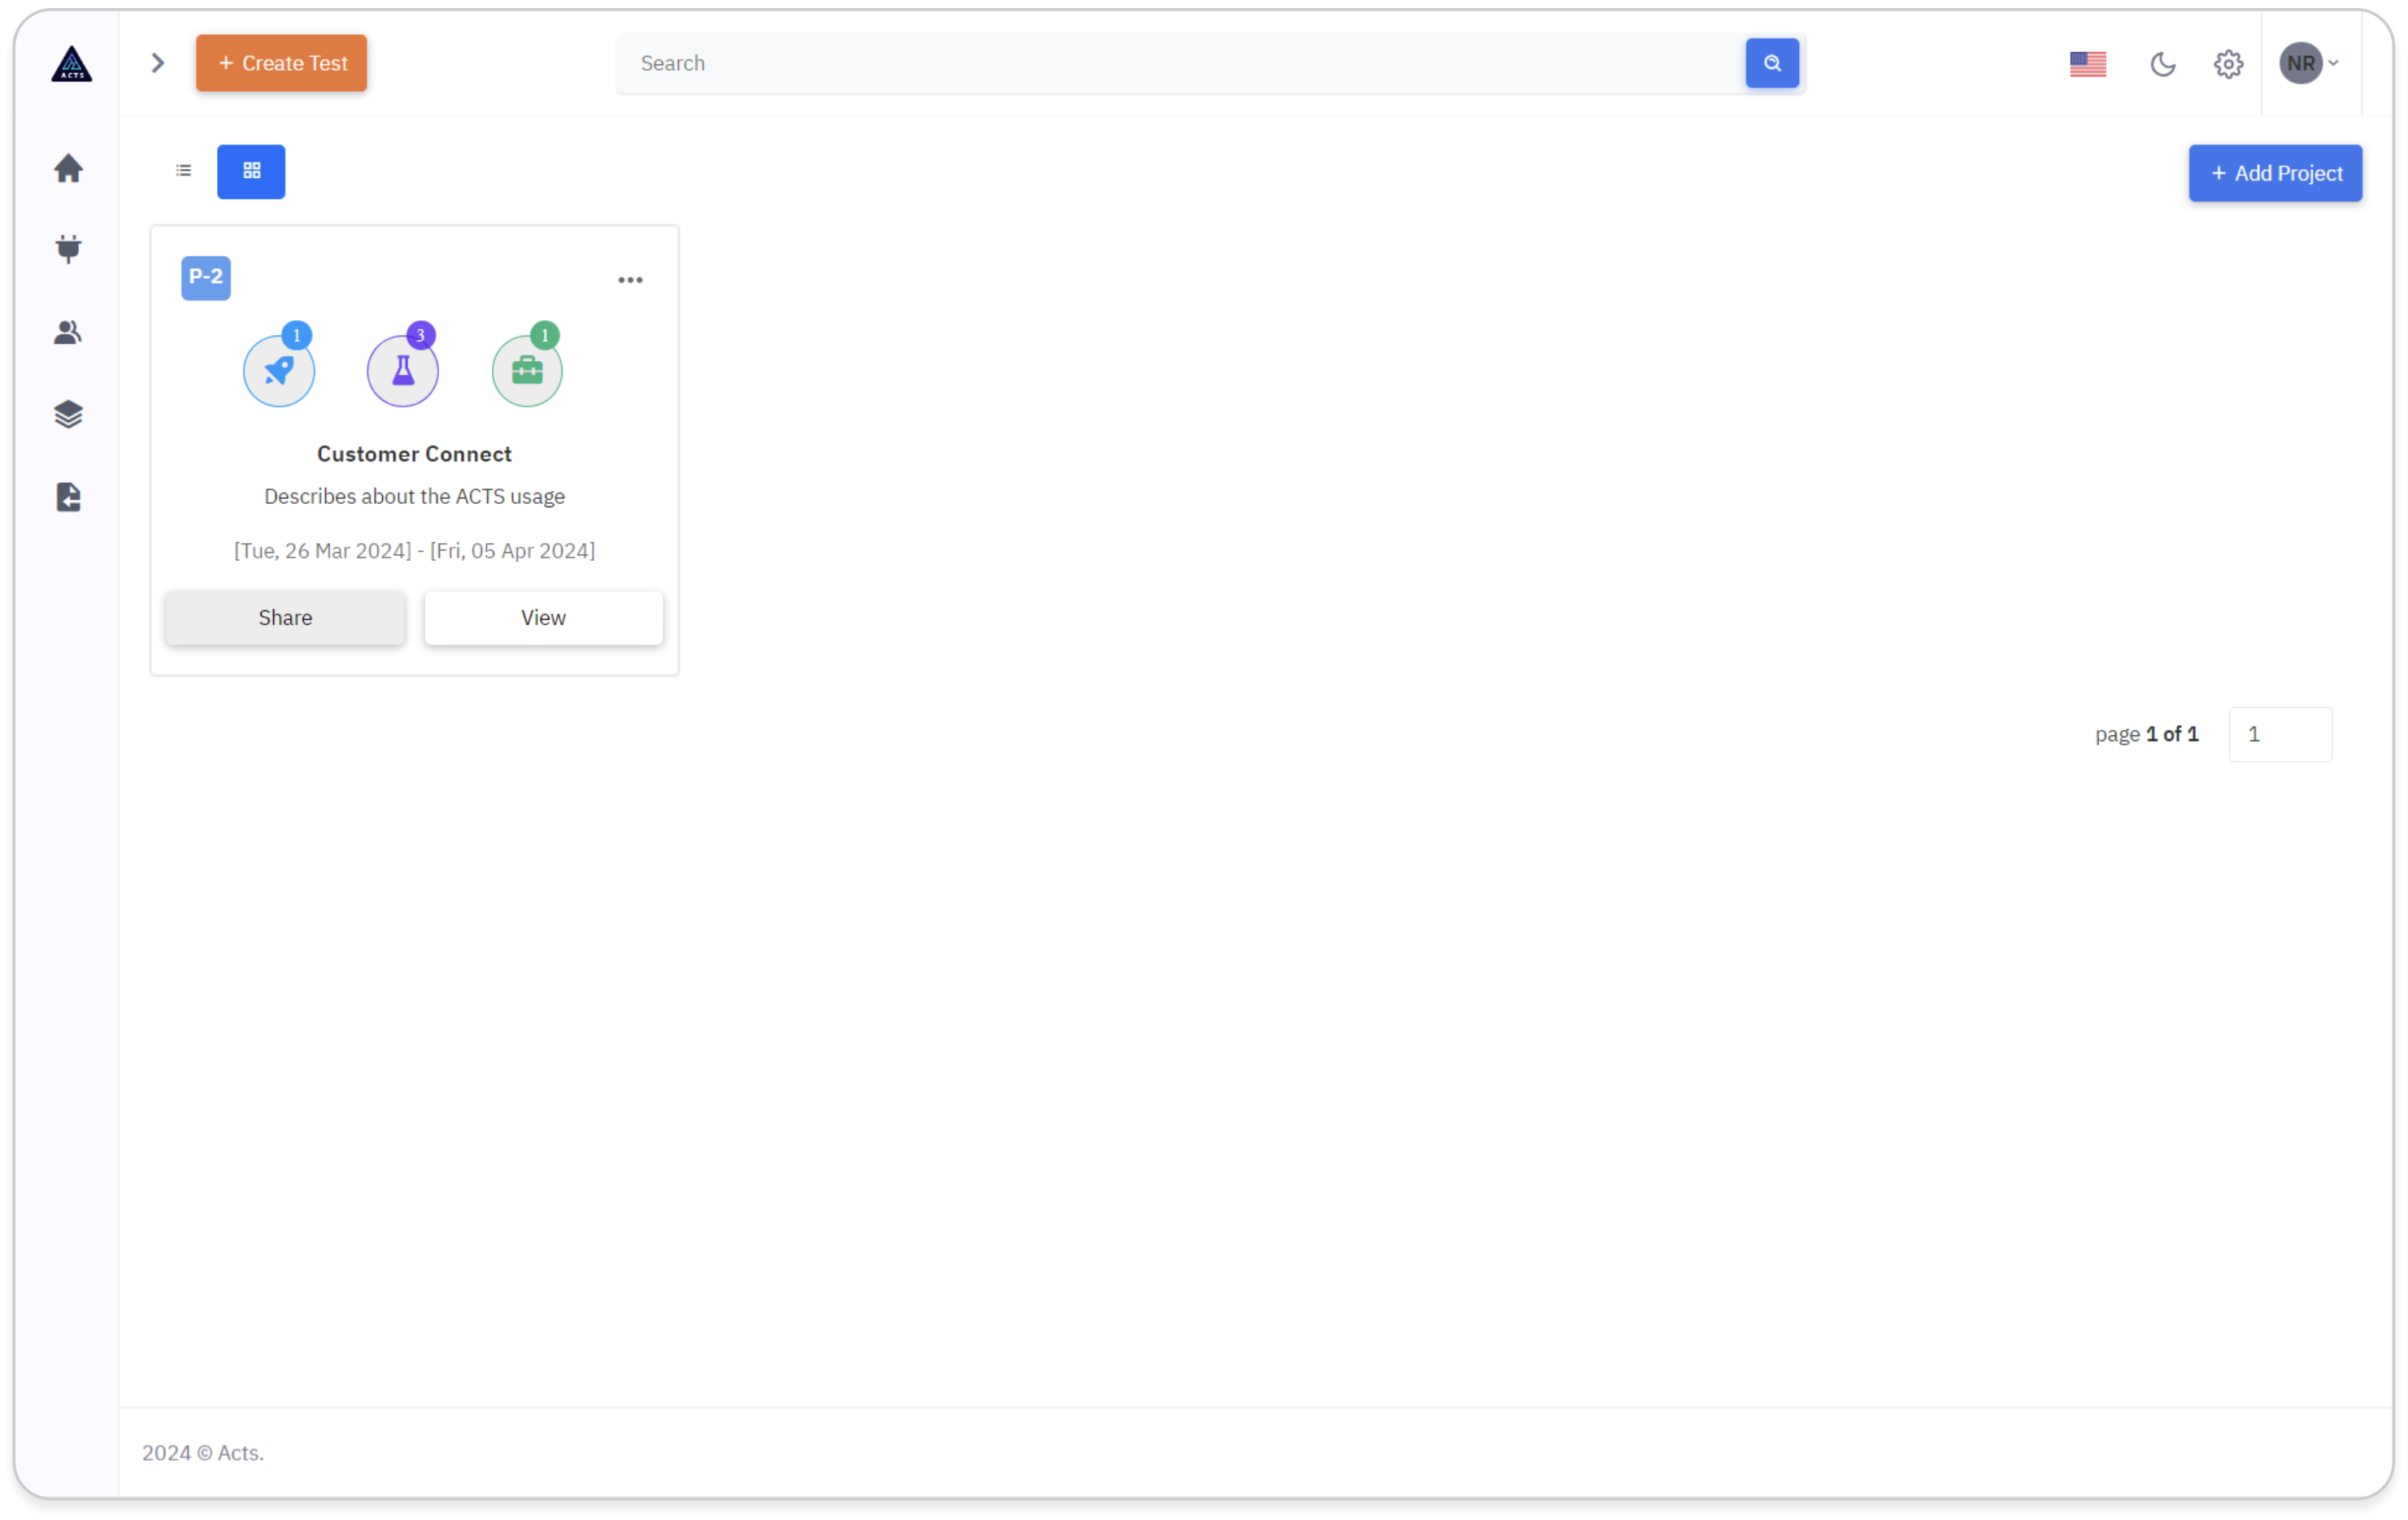
Grid View
In the grid view of the Connections module, users can view their created projects in a visually organized layout.
Each project is presented with its unique ID.
Users can easily manage their projects by utilizing the ellipse icons provided, allowing for seamless editing, deletion, or copying of connections.
The sharing option provides the ability to share the project with different ACTS Teams.
Clicking on "View" button redirects users to the Releases Page which displays the details of the Releases within the selected project.
This intuitive interface enhances connection management and promotes efficient integration within our application.
Create a Project
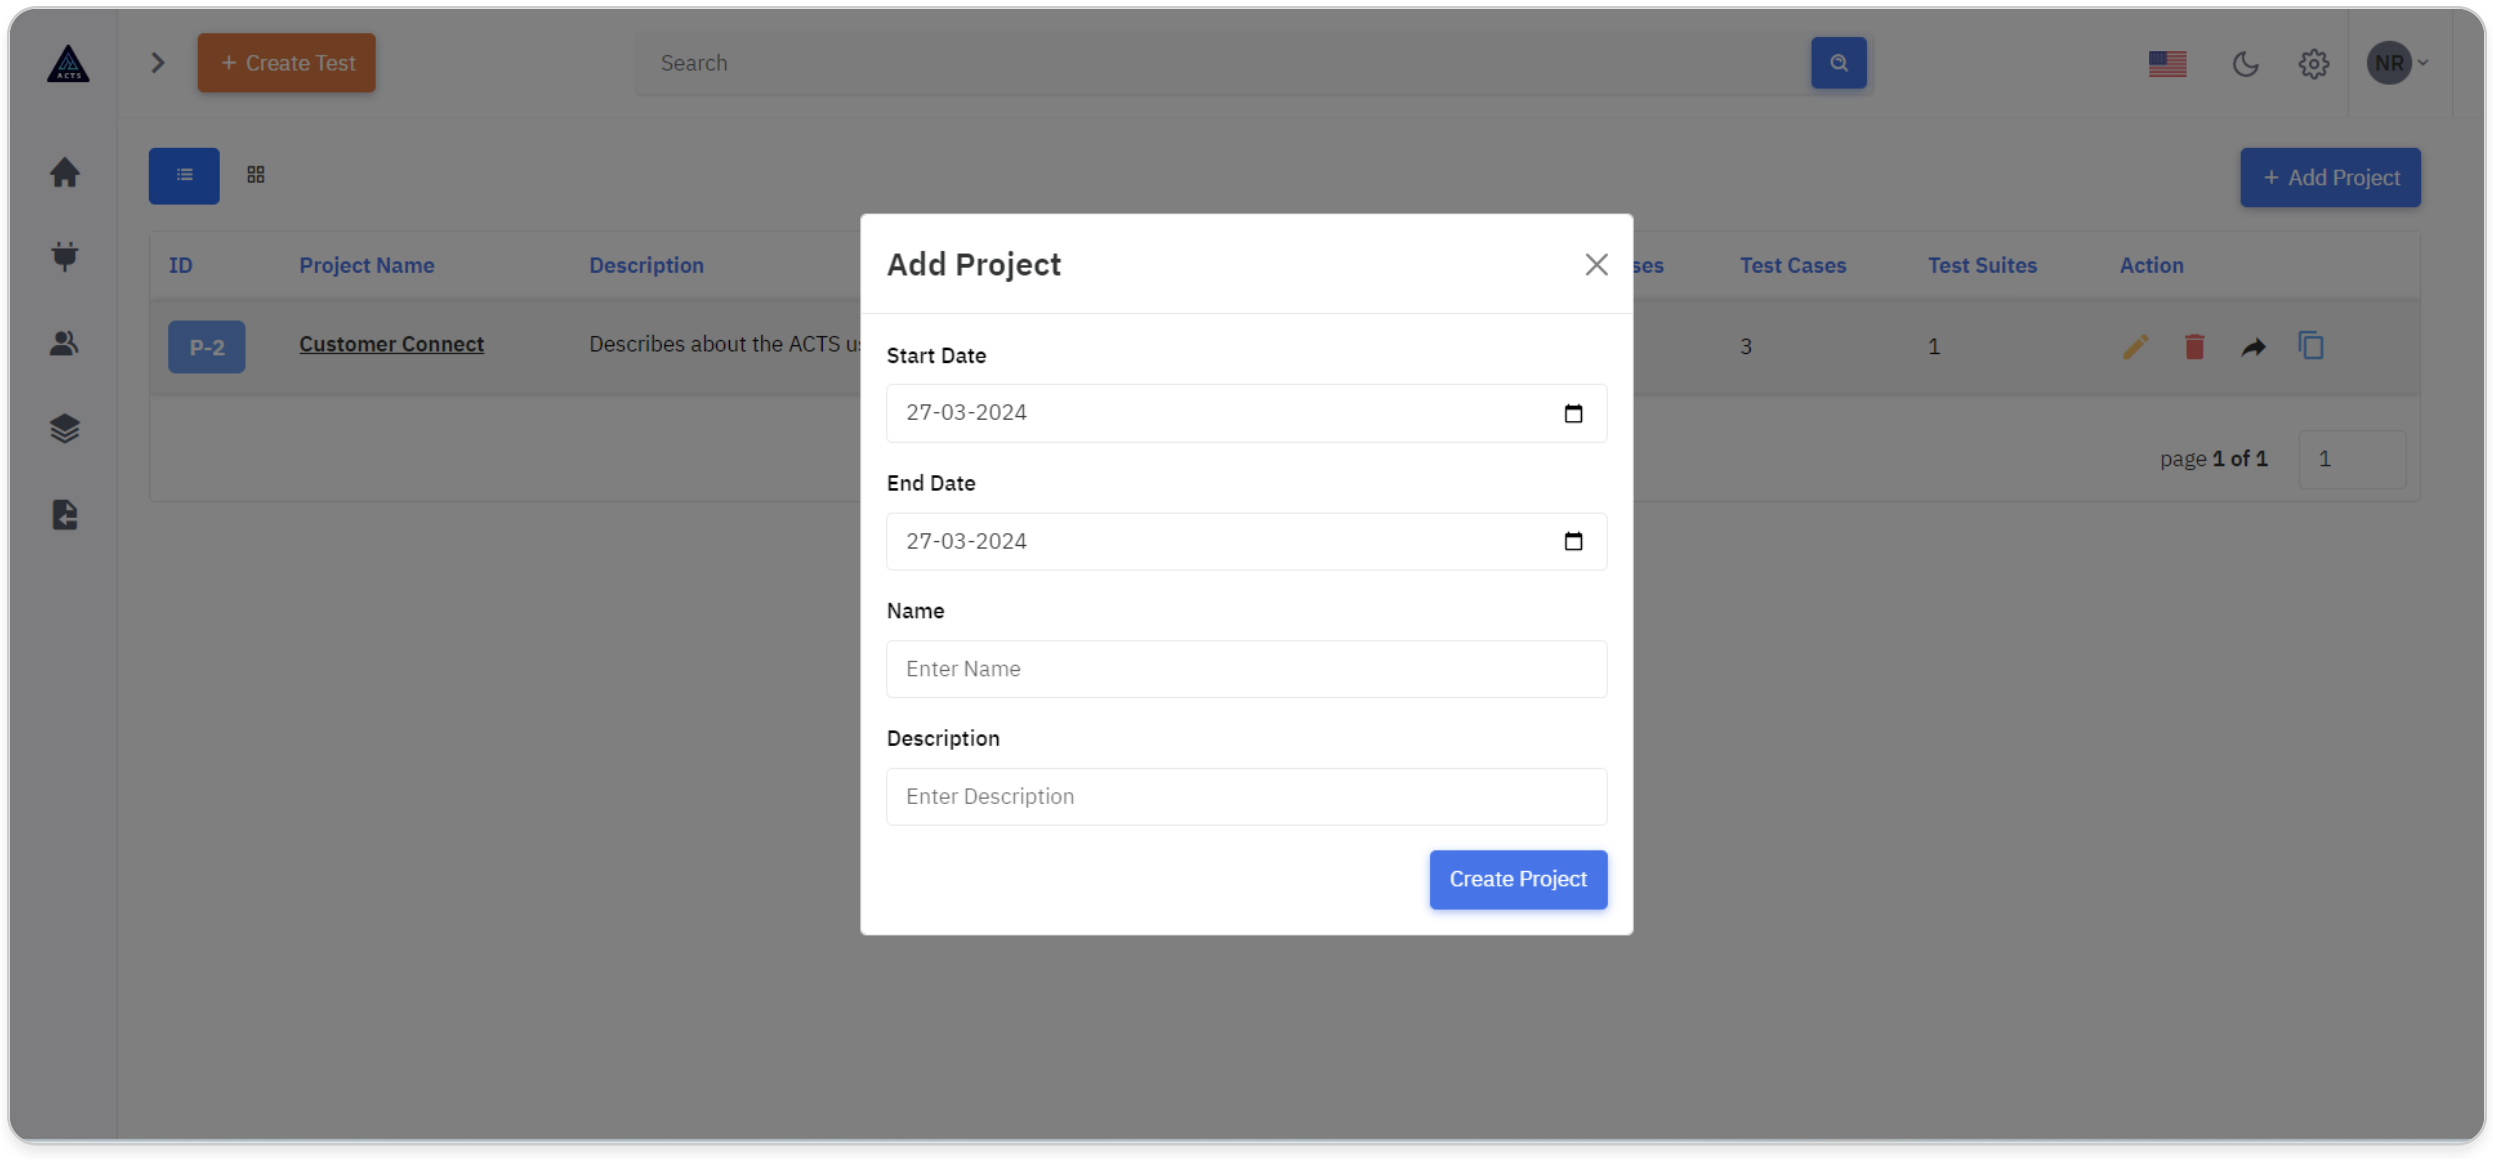
To create a new project, click on the “Add Project” button at the top right corner of the page.
A modal will pop out, enabling users to create a new project.
The modal for creating a project will ask for the details like Start Date, End Date, Name of the Project and Description.
Enter the details asked for and click on the "Create Project" button to create the Project.
Update a Project
When editing a project, a modal will appear displaying all existing data, with fields pre-filled for easy reference and modification.
Users will have the ability to modify as needed directly within the modal interface.
Once adjustments have been made, users can click on the "Update Project" button to save the changes and update the team information accordingly.
