Connections
The Connection module serves as a pivotal component within our application, enabling a seamless integration with a diverse array of external systems including Jira, Databases, and Tableau. This documentation meticulously delineates the requisite configuration steps for each distinct connection type, supplemented with troubleshooting guidelines to ensure an uninterrupted integration experience.
Homepage
The Home Page of the Connections module serves as the central hub for initiating and managing connection flows within the application. It provides users with a streamlined interface to seamlessly implement integration with external systems.
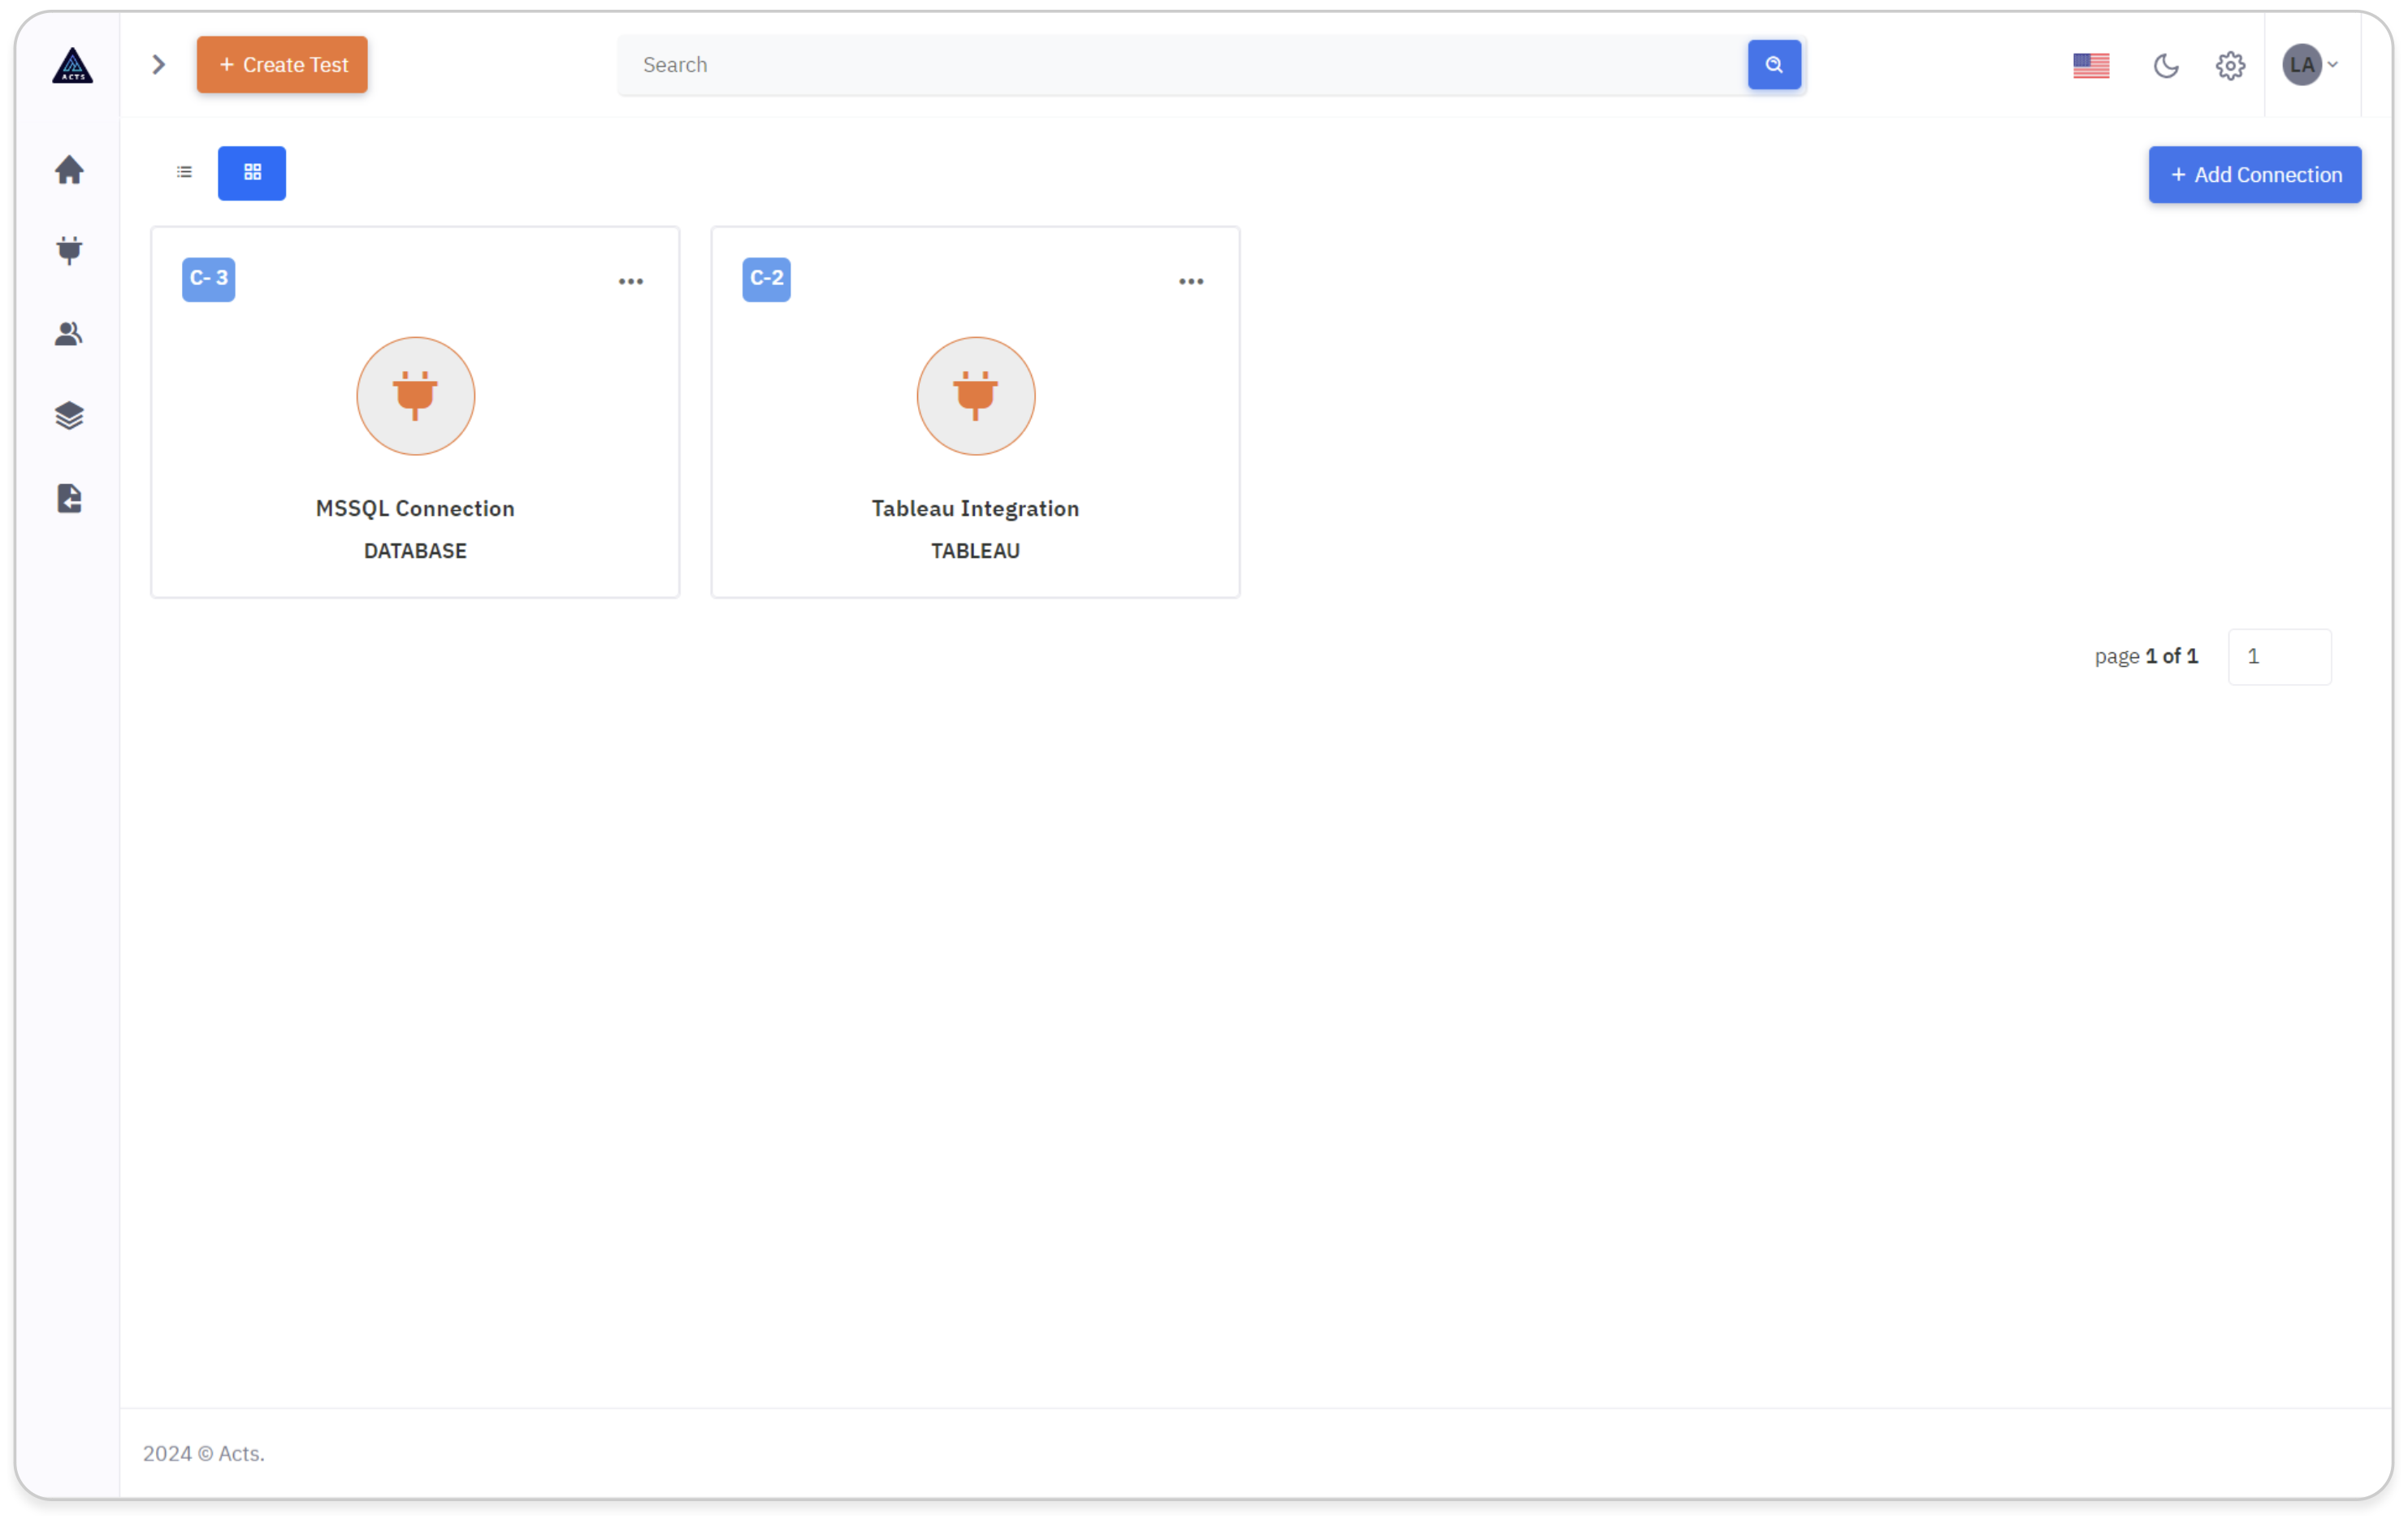
The image represents the home page of the Connections module, accessible via the connection icon in the side navigation bar. Here's a simplified guide to navigating this interface effectively:
Navigation
Begin by identifying the Connections icon positioned on the left navigation bar. This icon serves as the gateway to access the Connections module's home page.
Clicking on the Connections icon will seamlessly redirect users to the designated home page interface.
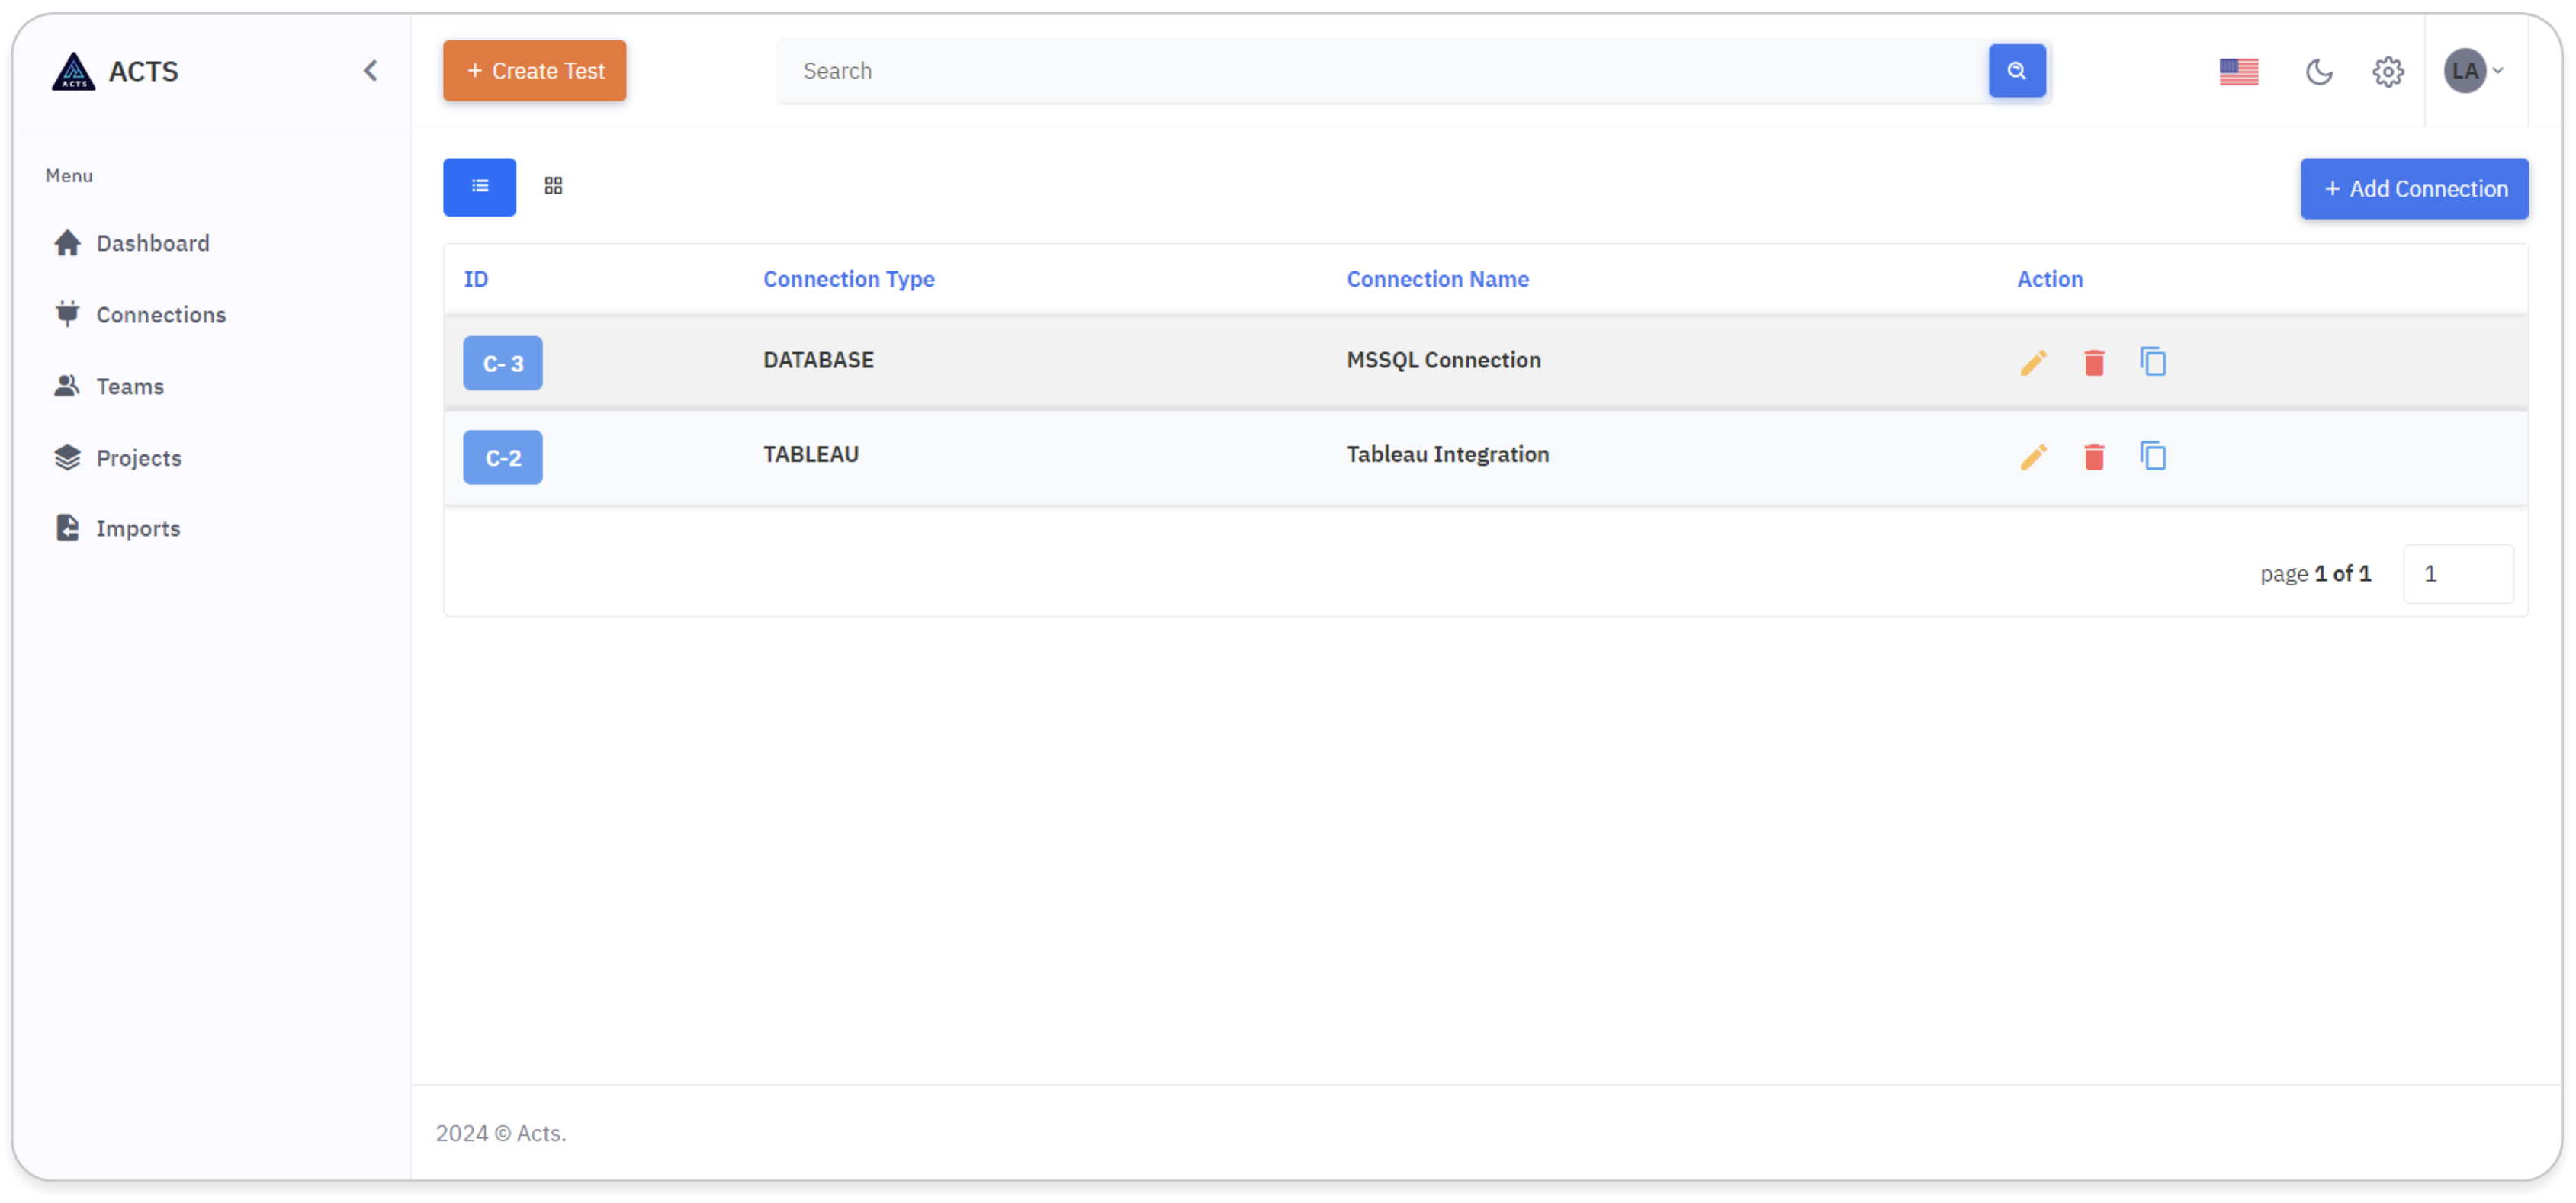
Upon accessing the home page, users will encounter a comprehensive display showcasing the connections they've created.
Connections are presented in an organized manner, offering users the option to view them either in list view or grid view, based on their preference and workflow requirements.
The navigation tab and the list and grid views are shown in the image below:
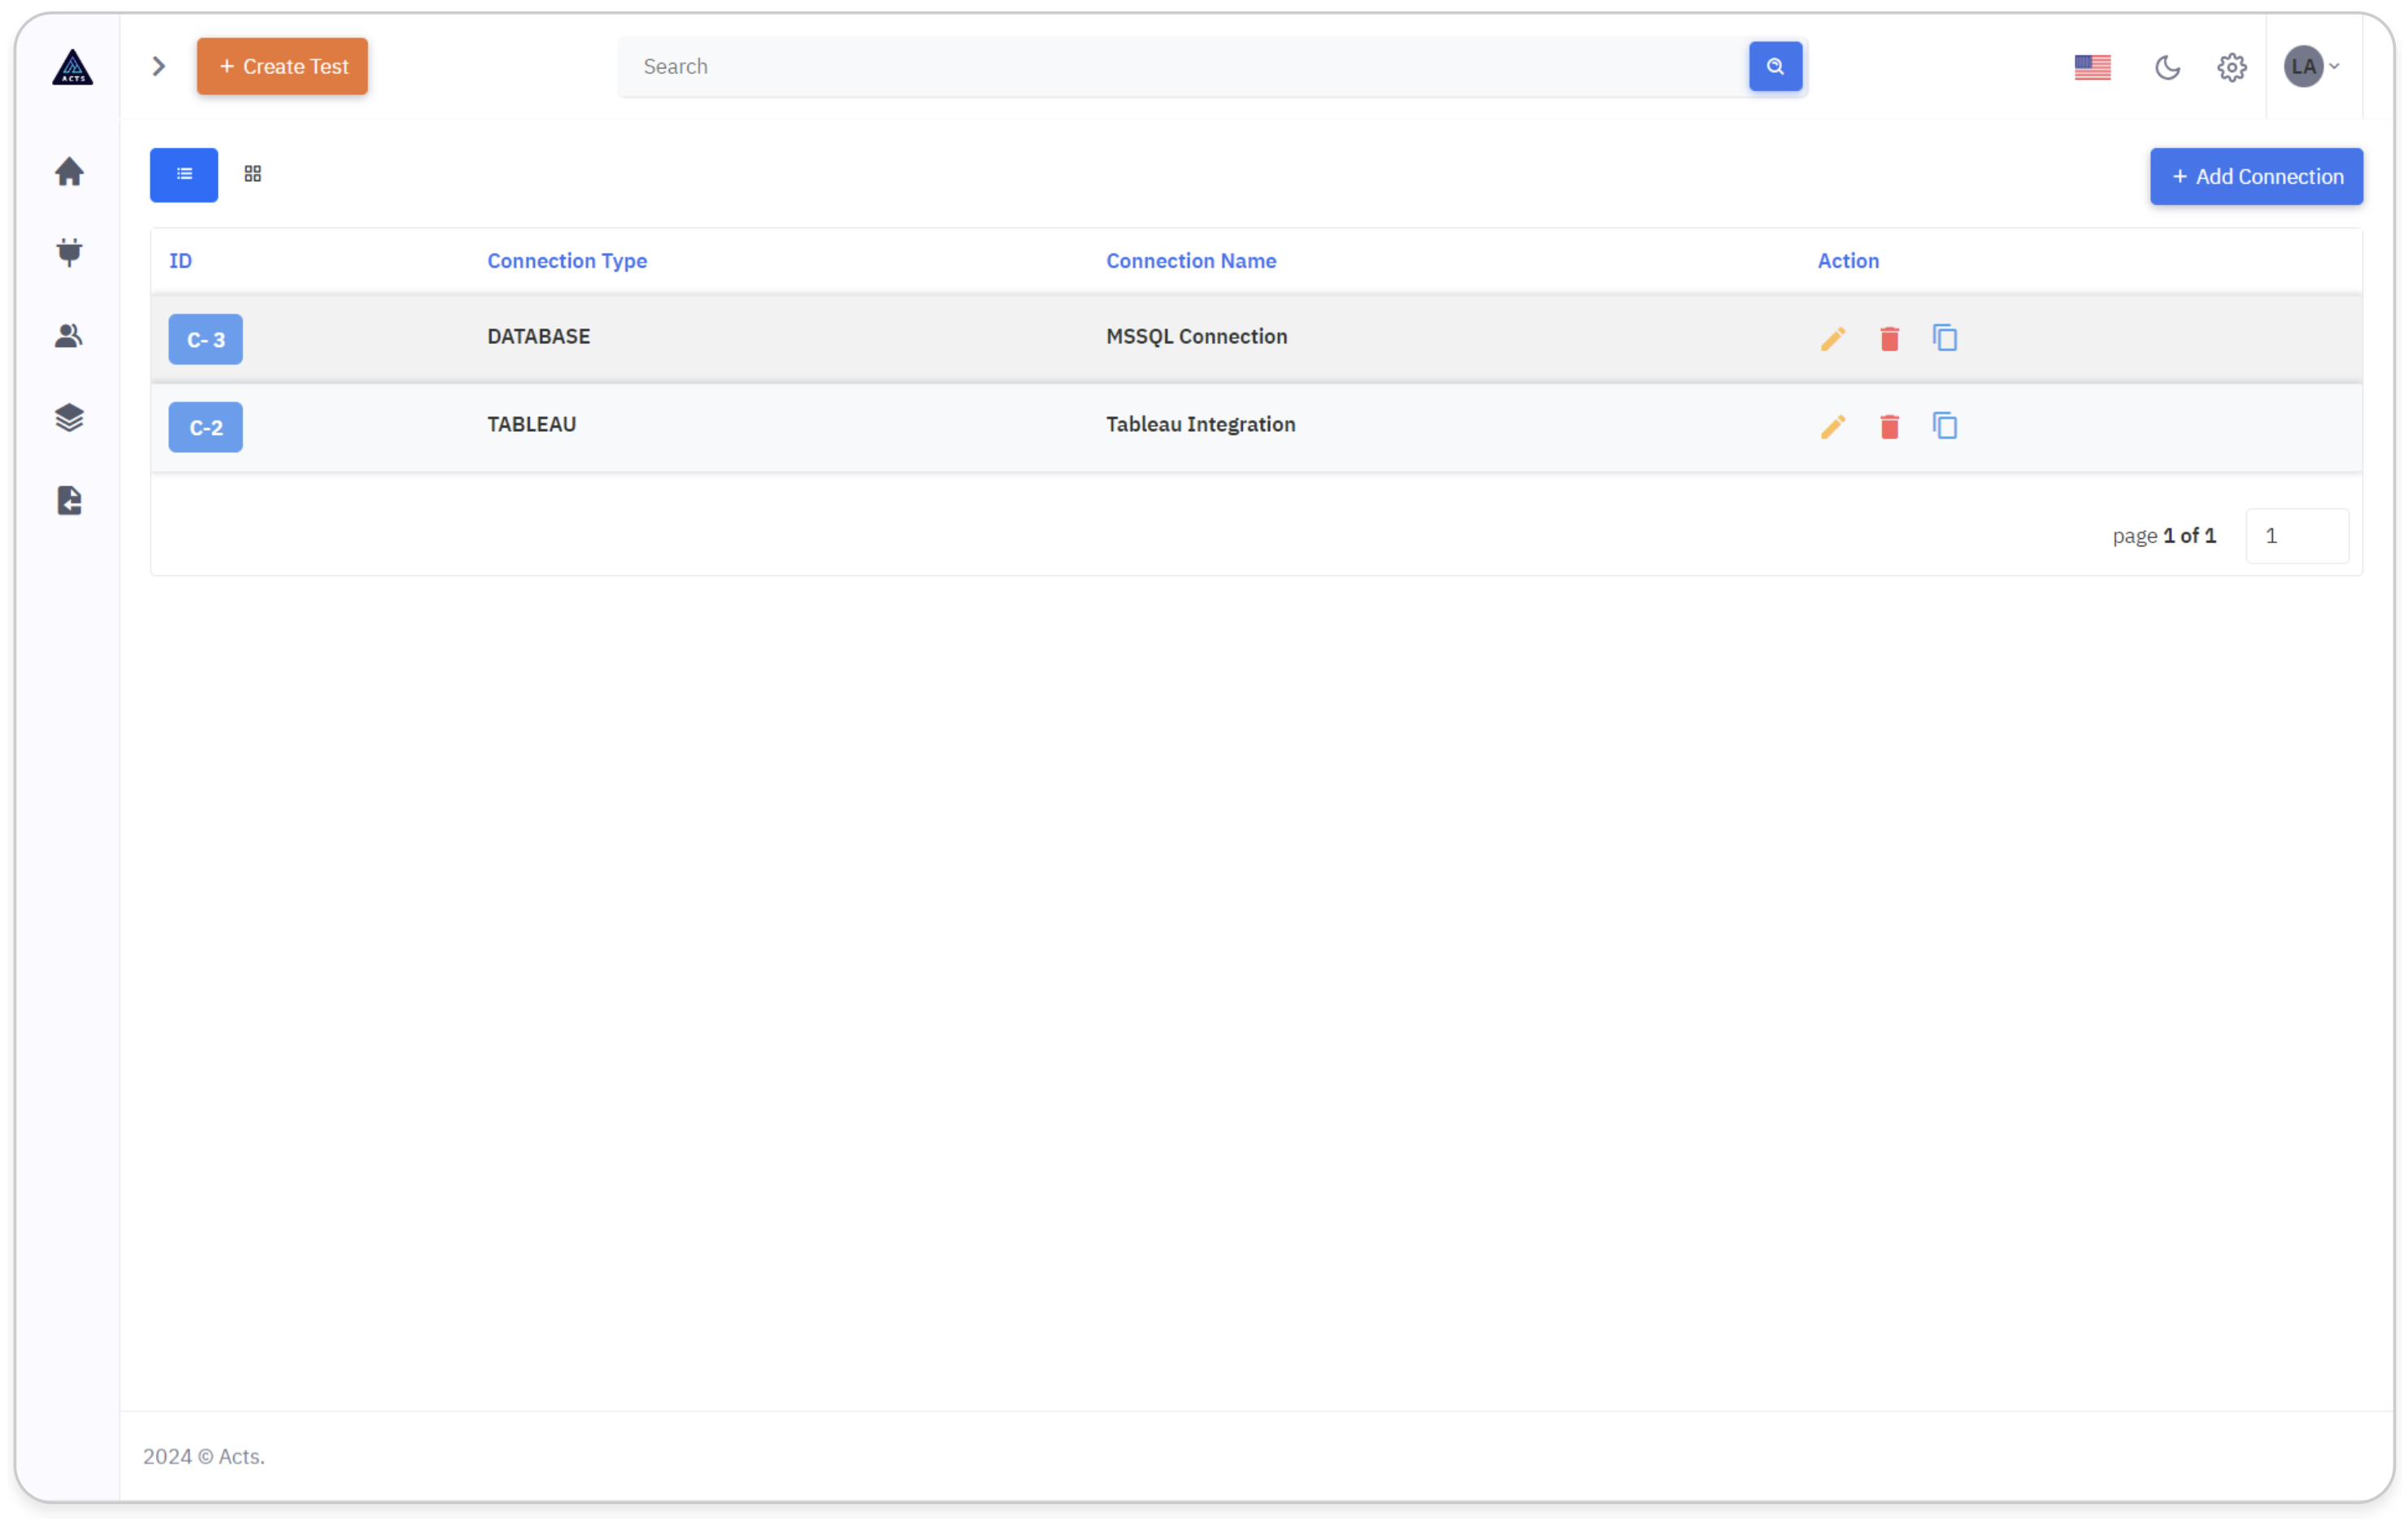
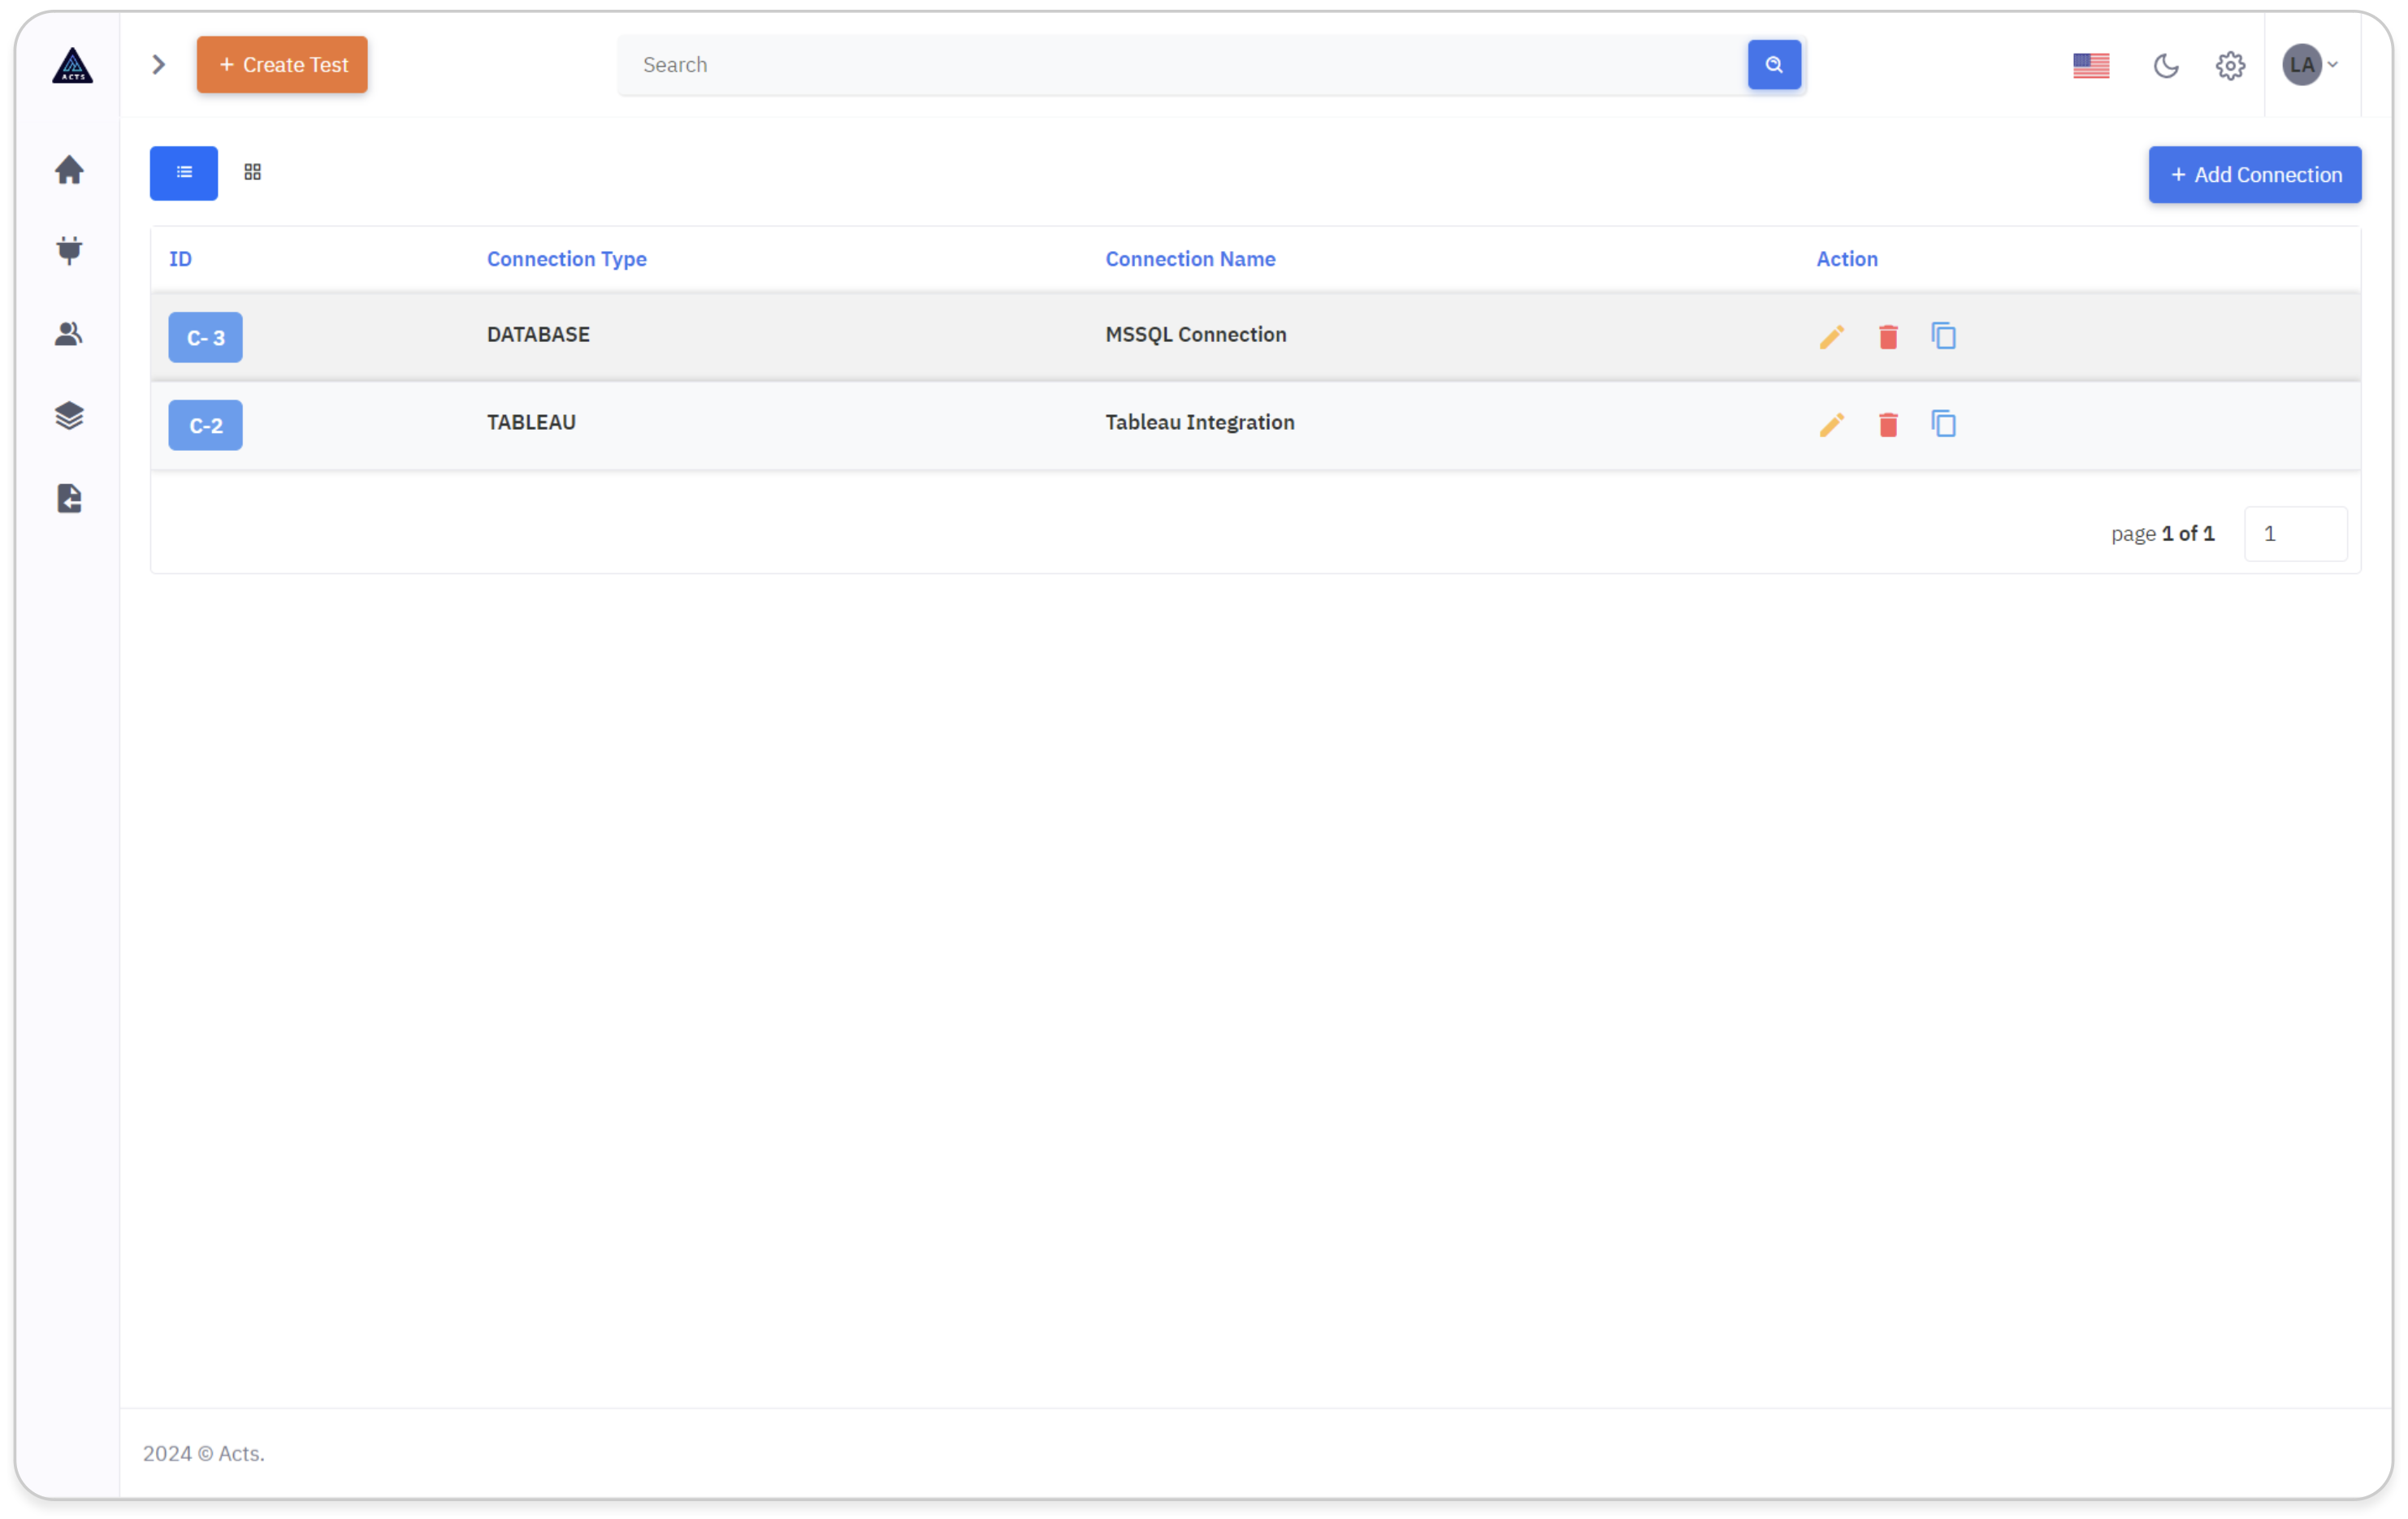
List View
In the list view of the Connections module, users can see their created connections.
Each connection is represented by a unique ID and displays the connection type.
Users can perform actions such as editing, deleting, or copying connections using the respective icons provided.
This streamlined interface simplifies connection management and facilitates efficient integration within our application.
Grid View
In the grid view of the Connections module, users can view their created connections in a visually organized layout.
Each connection is presented with its unique ID and corresponding connection type and name.
Users can easily manage their connections by utilizing the ellipse icons provided, allowing for seamless editing, deletion, or copying of connections.
This intuitive interface enhances connection management and promotes efficient integration within our application.
Create Connection
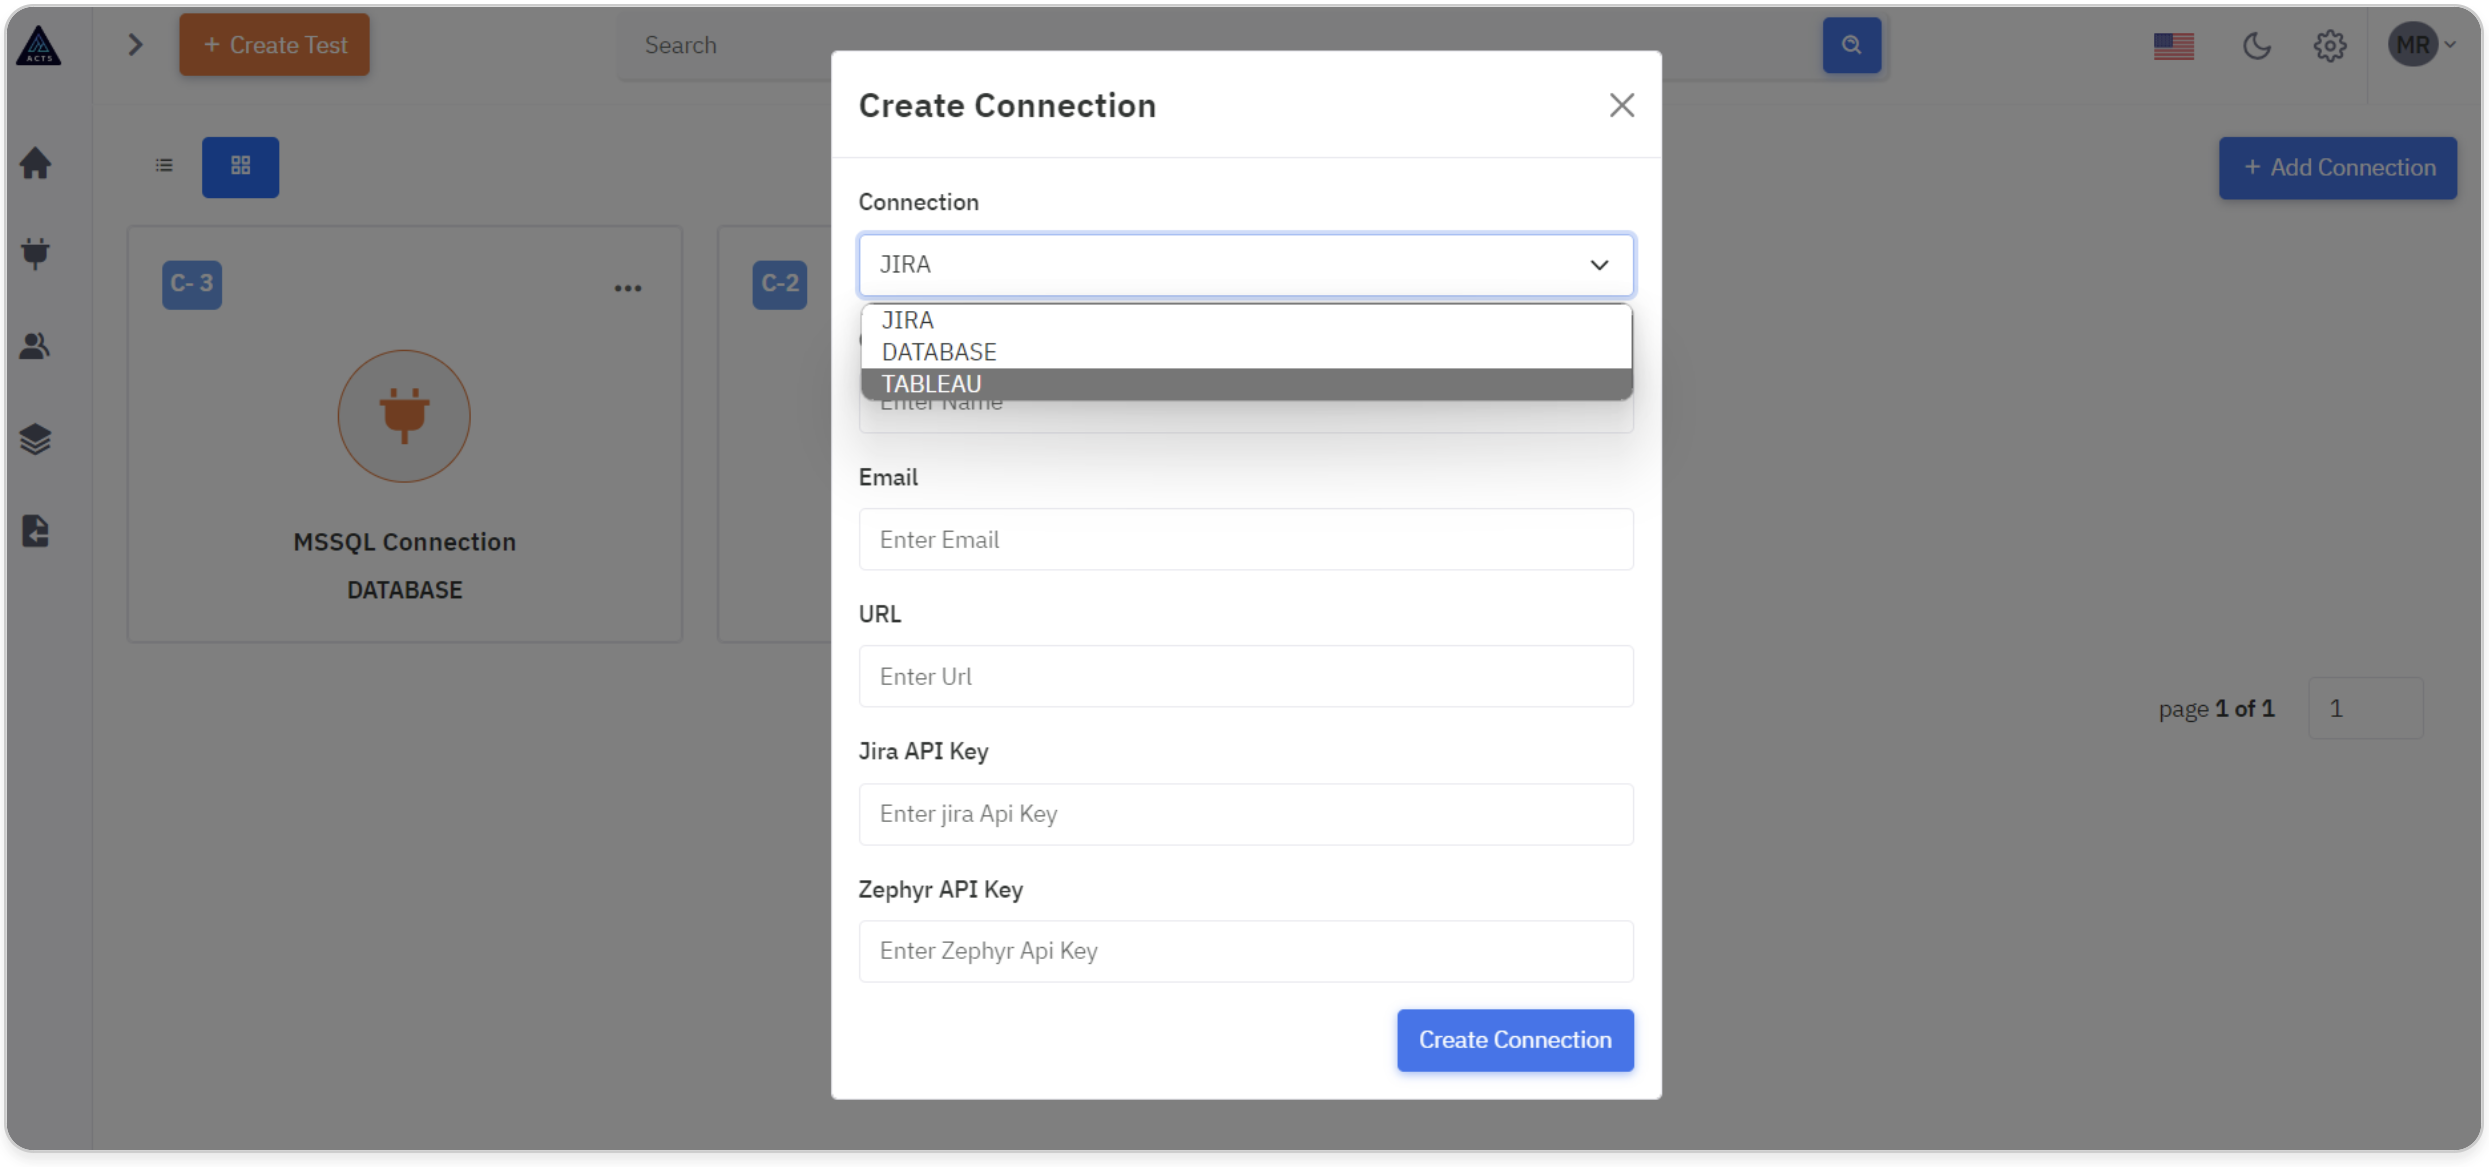
To create a new connection, click on the “Add Connection” icon at the top right corner of the page.
A modal will pop out, enabling users to create a new connection.
The modal for creating a connection will encompass configurations for various types of databases, ensuring comprehensive integration capabilities.
Types of Connections
Jira Connections.
Database Connections.
Tableau Connections.
The modals for creating connections will feature a dropdown menu listing various types of connections available. Users can choose from options such as Jira, Database, and Tableau.
What is a Jira Connection
The Jira connection allows users to interact with Jira issues and projects directly from within the system. This integration streamlines workflow management by providing seamless access to Jira data.
All the fields which are the in the Jira model are validated, all fields should be filled mandatorily.
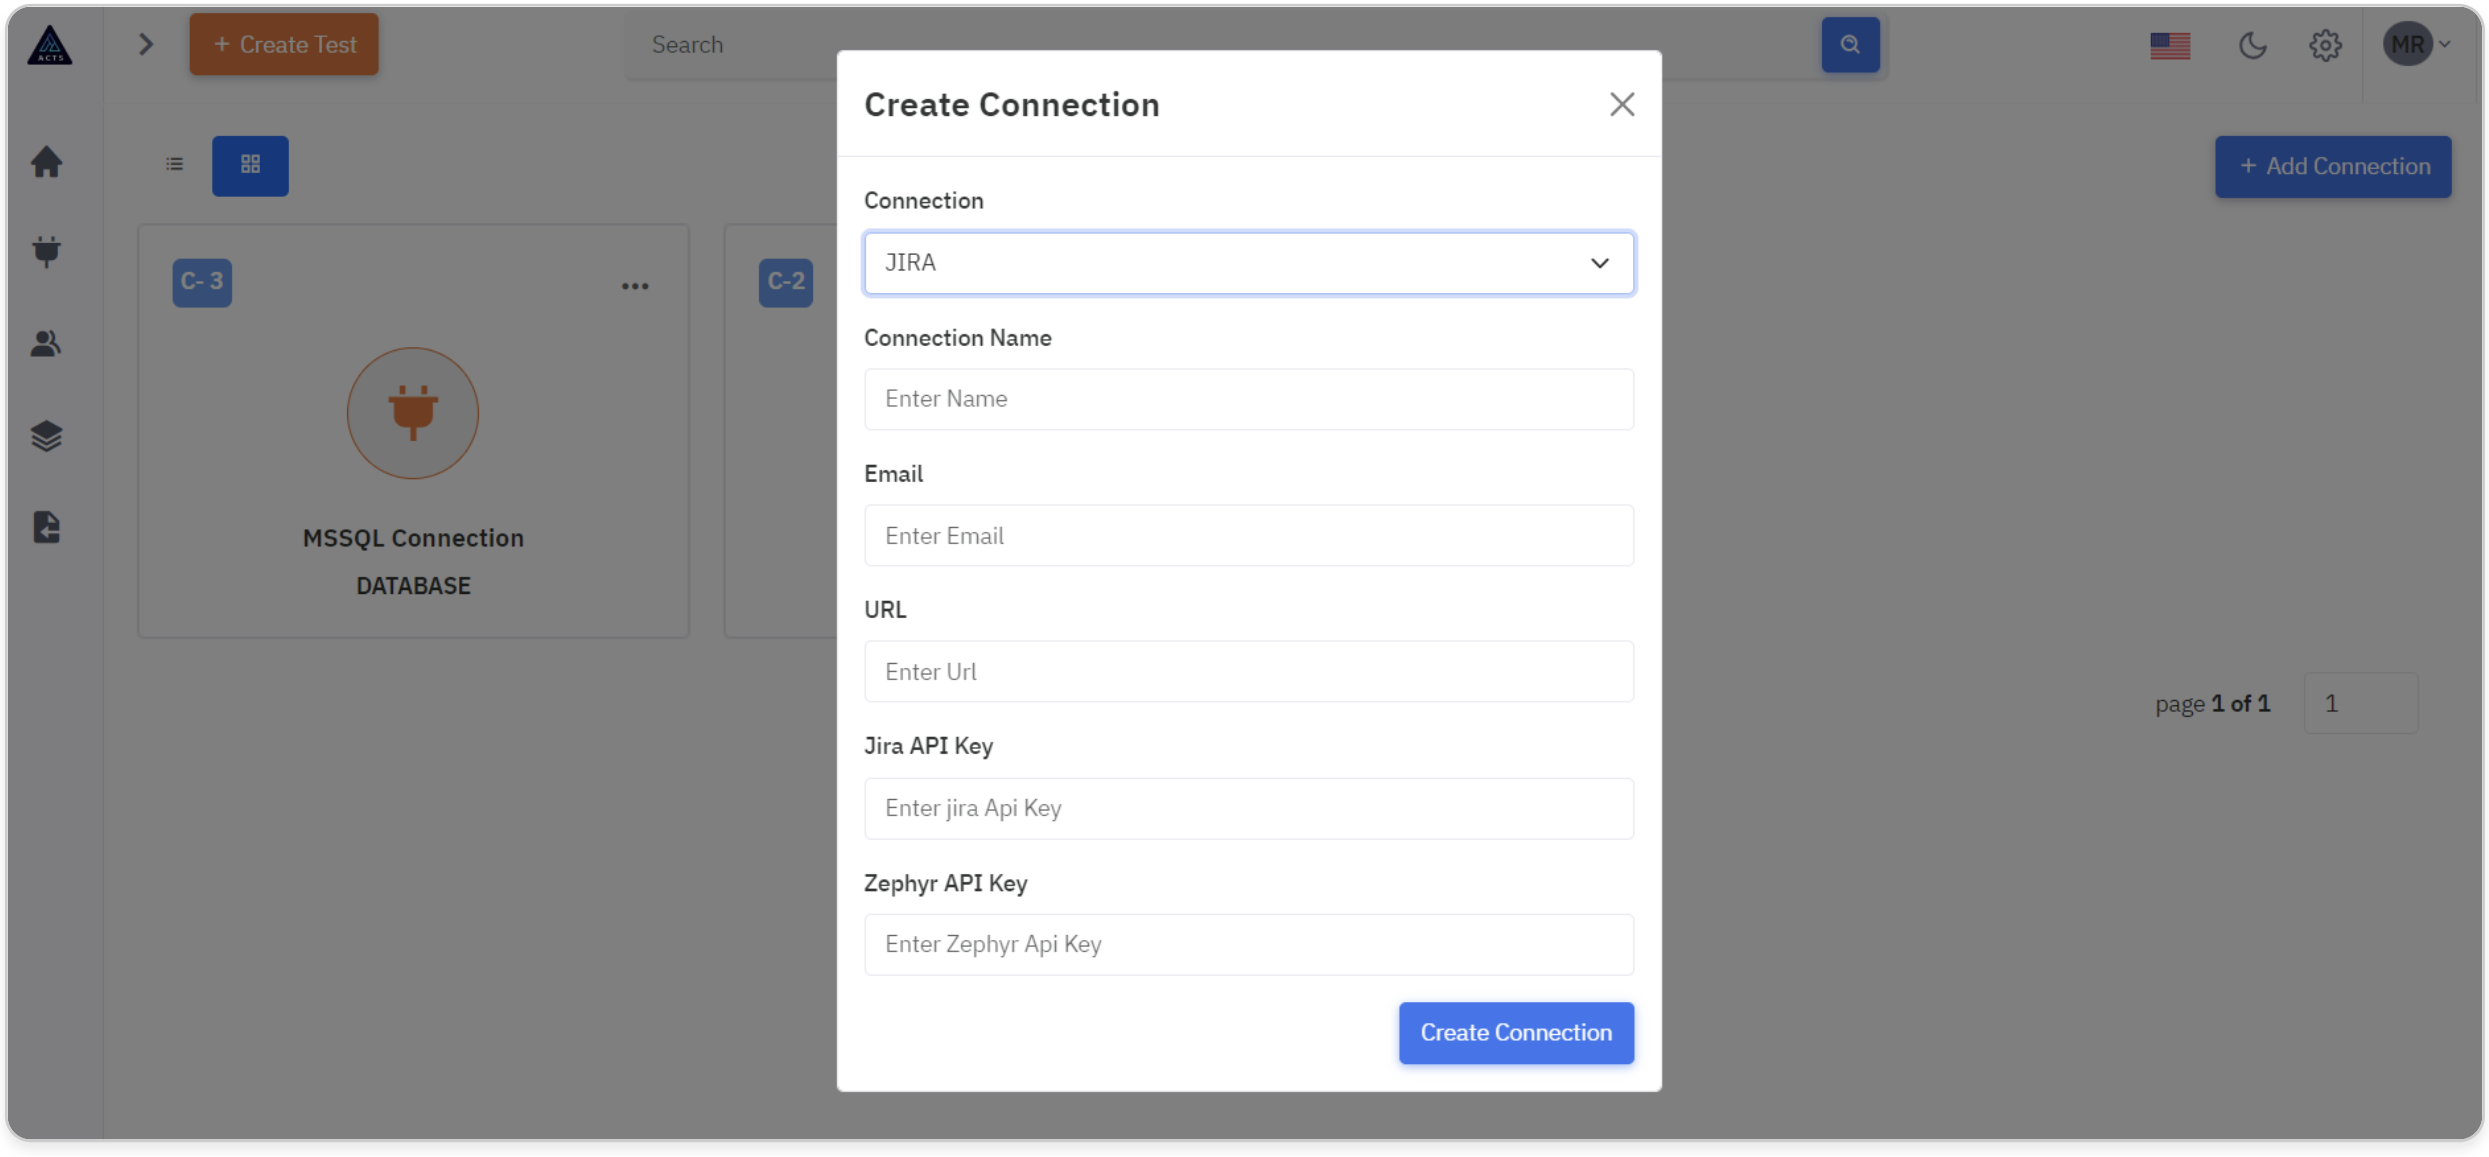
Connection Name
Provide a descriptive name for the Jira connection, facilitating easy identification and management within the application.
Email
Input the email address associated with the Jira account to authenticate and authorize access to Jira data.
URL
Enter the URL of the Jira server where the desired projects and issues are hosted. This ensures the connection is directed to the correct Jira instance.
Jira API Key
Generate an API key within the Jira account settings or use an existing API key, if available. This key serves as the authentication token for accessing Jira data through the API.
To know more about it Manage API tokens for your Atlassian account | Atlassian Support.
Zephyr API Key (if applicable)
If integrating with Zephyr for Jira (a test management tool), provide the Zephyr API key for additional functionality related to test management.
To know more about it.
Create Connection
Finally, click the "Create Connection" button to create the connection.
What is a Database Connection
The Database Connection feature allows seamless integration with various database management systems (DBMS), empowering users to query and retrieve data directly from databases within the application.
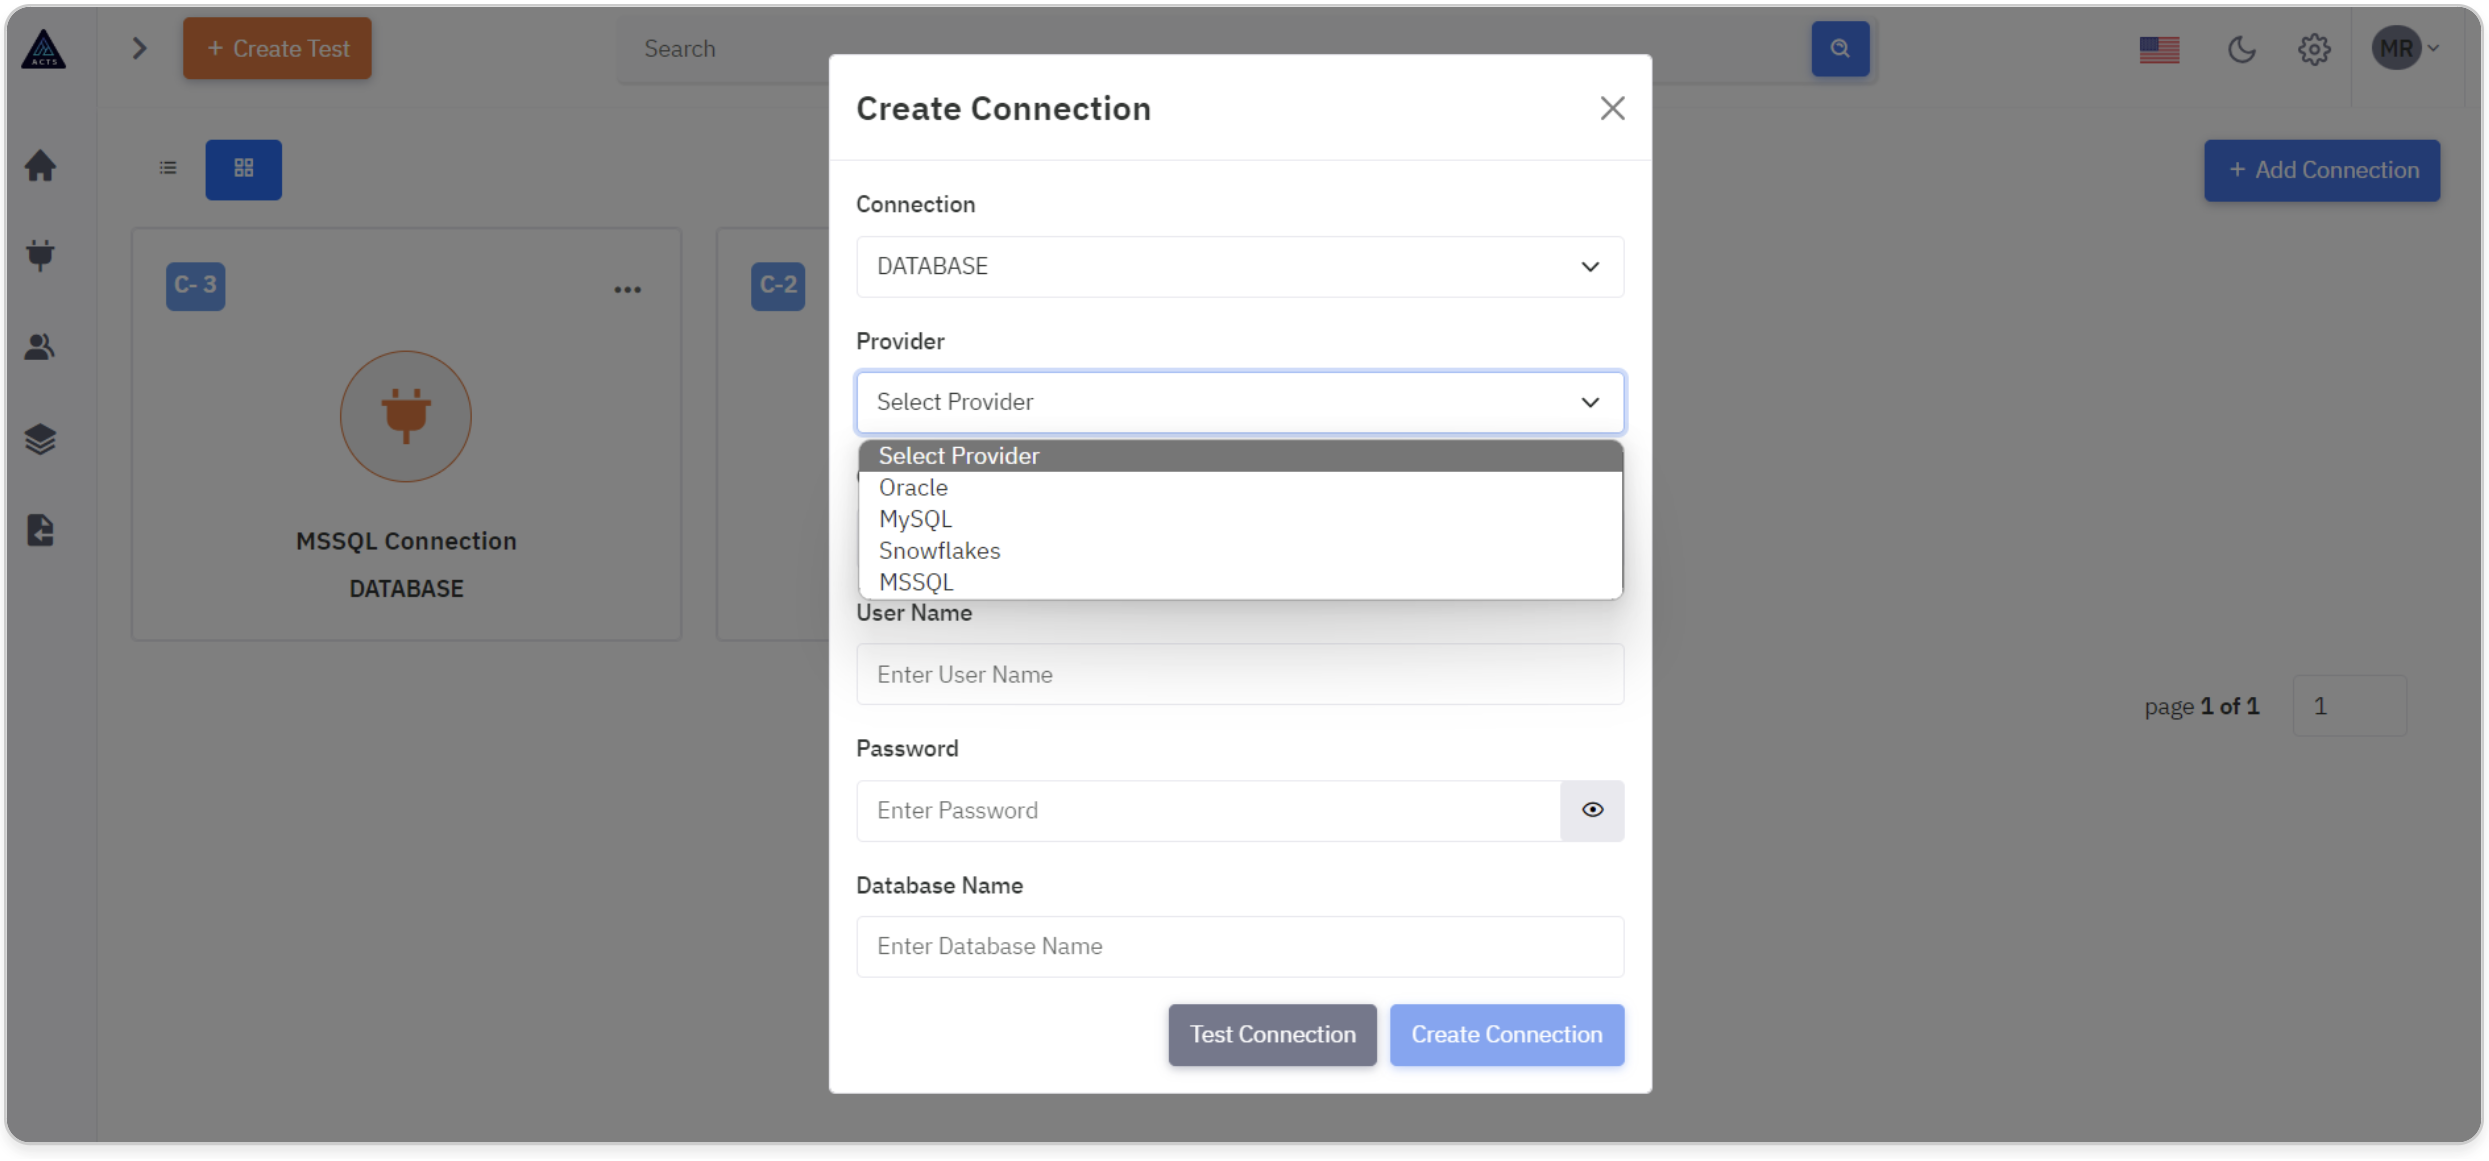
In the Database connection model, users will encounter a dropdown menu listing various database connection providers available.
The providers include:
- Oracle
- PostgreSQL
- Snowflake
- MySQL
- MSSQL (Microsoft SQL Server)
Users can select the desired provider from this dropdown menu, allowing them to establish connections with their preferred database management system.
This flexible approach enables users to seamlessly integrate with a diverse range of database providers, catering to their specific database infrastructure and requirements.
Connection Name
Provide a unique and descriptive name for the Database connection. This name will be used to identify the connection within the application.
Username
Input the username associated with the Database. This is typically the credentials used to authenticate access to the Database.
Password
Enter the password corresponding to the provided username. This ensures secure authentication for accessing the Database.
Database Name
Specify the name of the Database within the database management system. This is the specific Database that users want to connect to.
Host
Input the hostname or IP address of the server where the Database is hosted.
This information is necessary for establishing the connection to the correct server.
Port
Specify the port number through which the database server communicates. This is typically a numeric value and varies depending on the database system and server configuration.
Test Connection
Before enabling the "Create Connection" button, the application will validate all entered fields and attempt to establish a connection to the specified database.
This ensures that only accurate and complete connection details are accepted. If the connection test is successful, the button will become enabled, allowing users to proceed with creating the database connection.
This approach minimizes errors and ensures a smooth setup process.
Create Connection
Finally, click the "Create Connection" button to create the connection.
What is Tableau Connection
In this section, users can establish a connection with Tableau, a powerful data visualization tool. This integration allows users to embed Tableau visualizations directly into the application, enhancing data analysis and presentation capabilities.
In order to configure the Tableau Connection in ACTS, the user needs a personal access token.
Users with accounts on Tableau Server can create, manage, and revoke personal access tokens (PATs) on the My Account Settings page.
Steps to be followed:
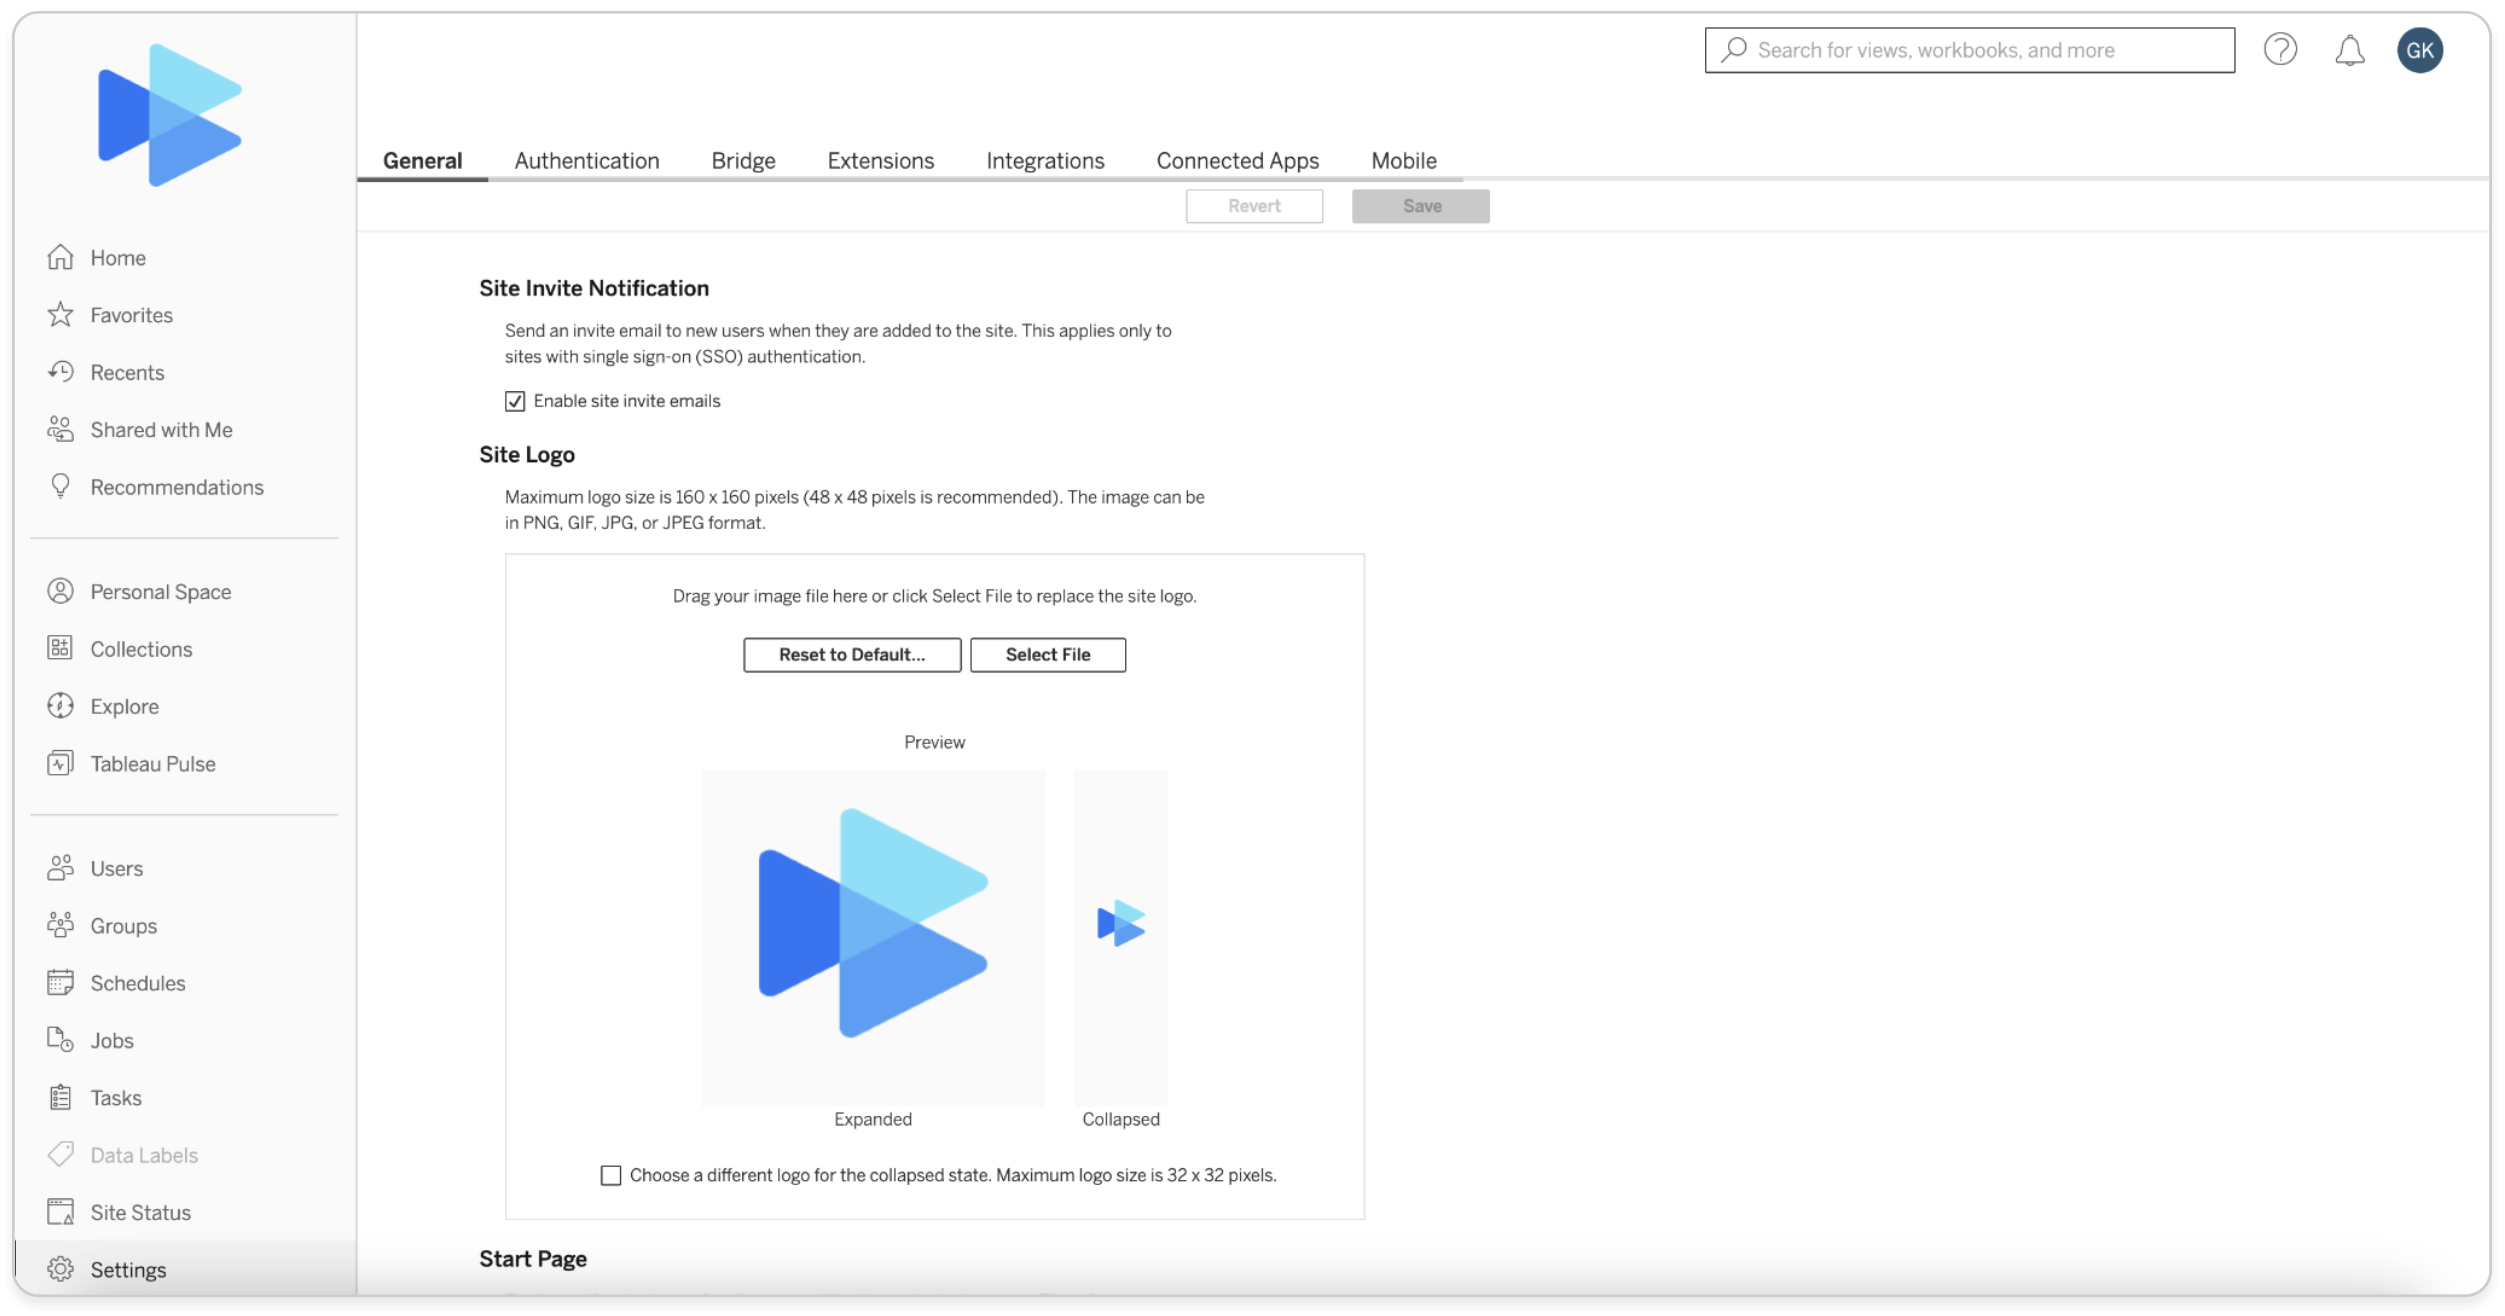
- Login to your Tableau account
- Upload a Custom Logo for your Site
- Create Personal Access Token:
- Visit the Account Settings page
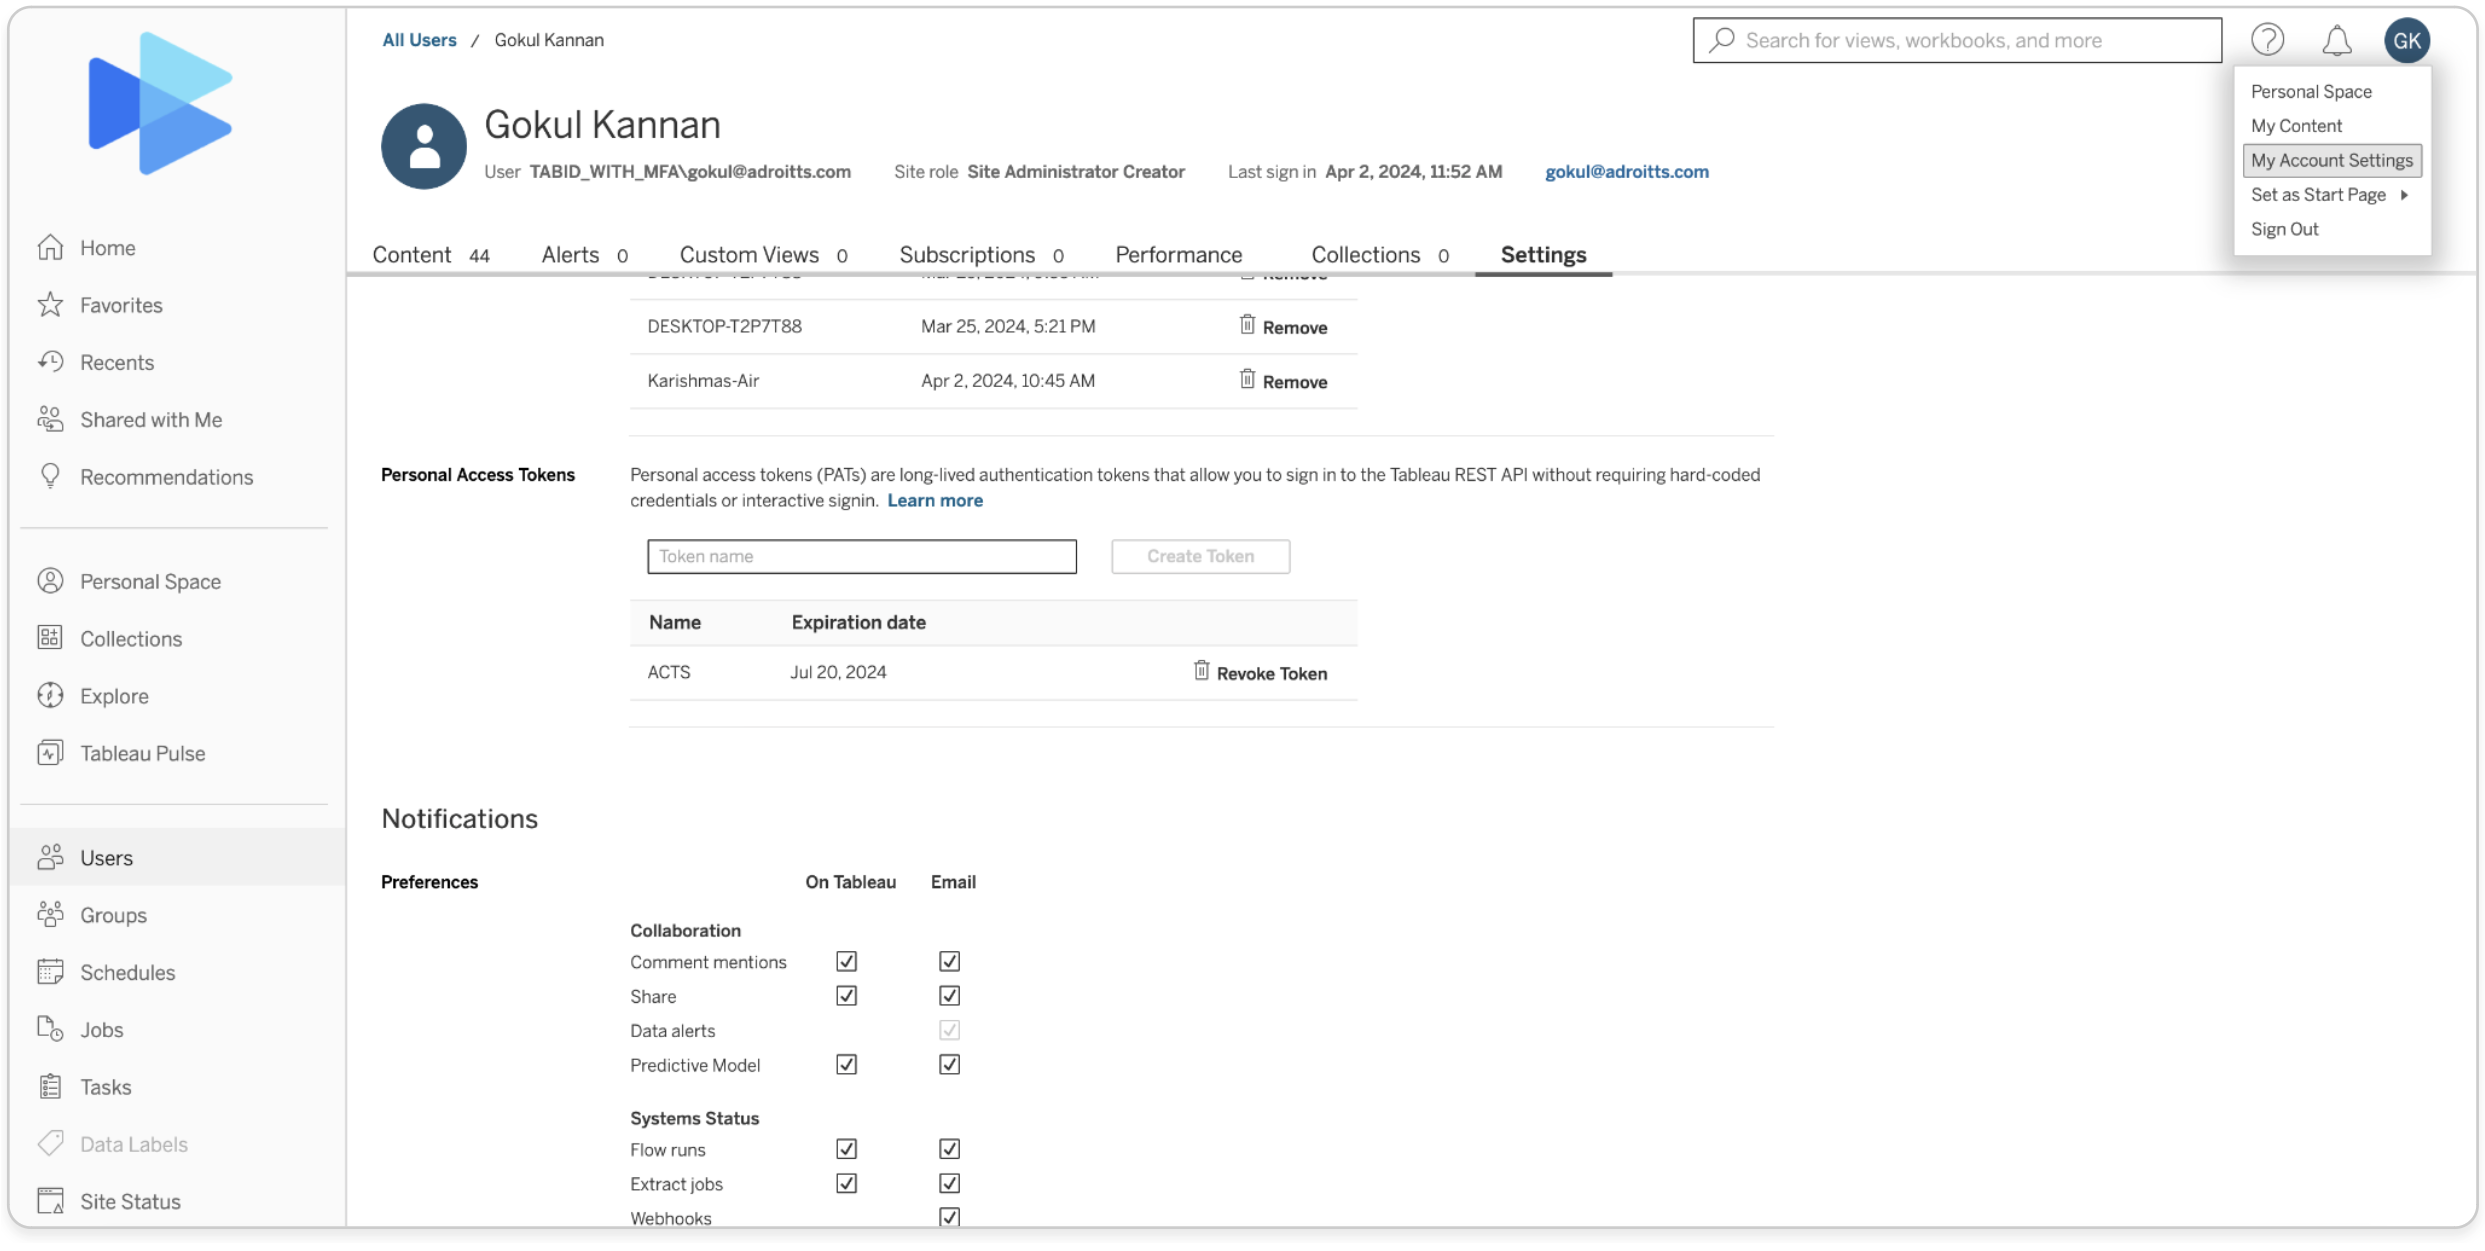
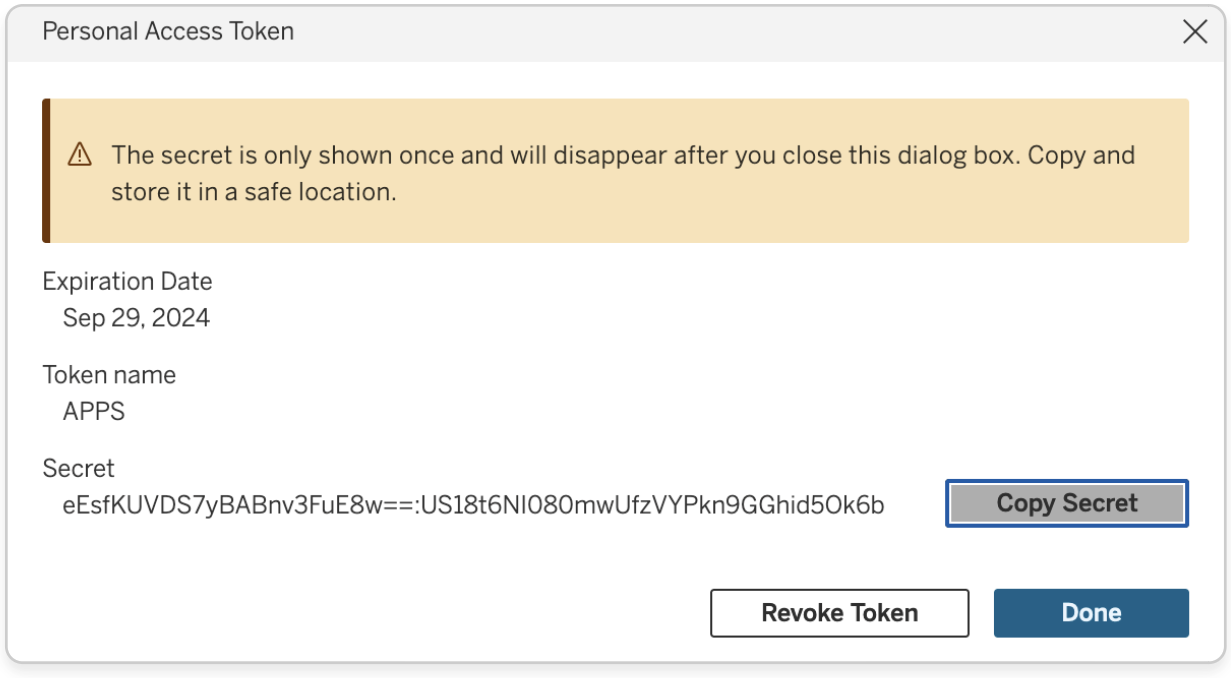
- Enter the Token Name and click Create Token

- Note down the Token Name and Secret key for using them in ACTS.
Configuring Tableau Connection in ACTS:
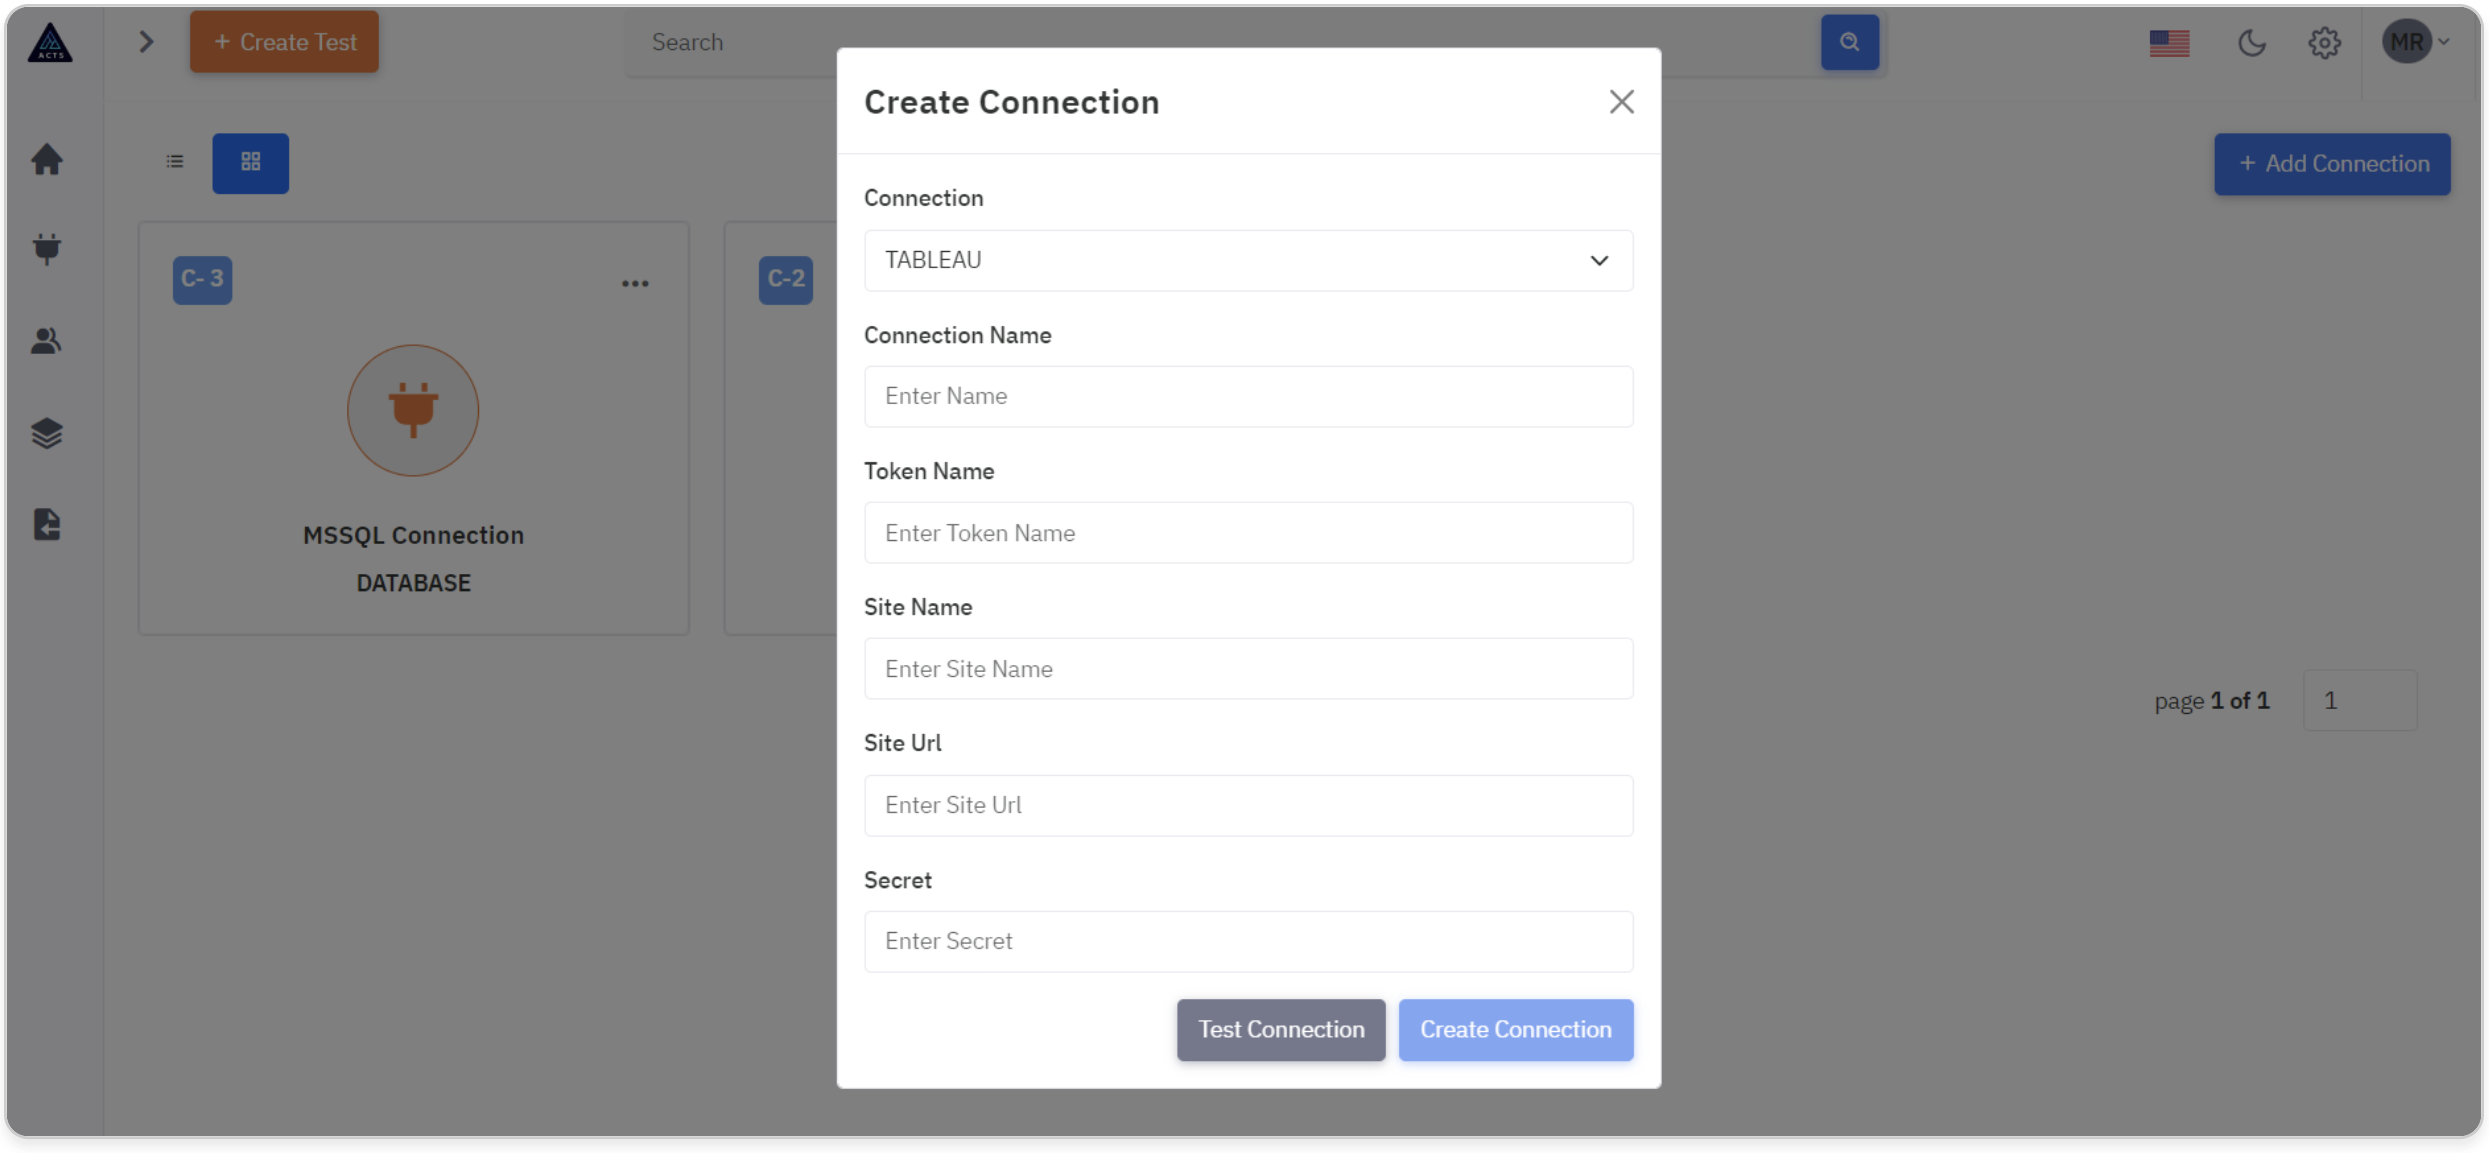
Connection Name
Enter a descriptive name for the Tableau connection. This name helps identify the connection within the application.
Token Name
Provide the token name associated with the Tableau authentication. This token allows secure access to Tableau resources.
Site Name
Specify the name of the Tableau site to connect to. This is the specific Tableau environment where visualizations are hosted.
Site URL
Input the URL of the Tableau site. This URL ensures the connection is directed to the correct Tableau environment.
Secret
Enter the secret key or authentication token required for secure access to Tableau resources.
Test Connection
Before enabling the "Create Connection" button, the application will validate all entered fields and attempt to establish a connection to the specified database.
This ensures that only accurate and complete connection details are accepted. If the connection test is successful, the button will become enabled, allowing users to proceed with creating the Tableau connection.
This approach minimizes errors and ensures a smooth setup process.
Create connection
Finally, click the "Create Connection" button to create the connection.
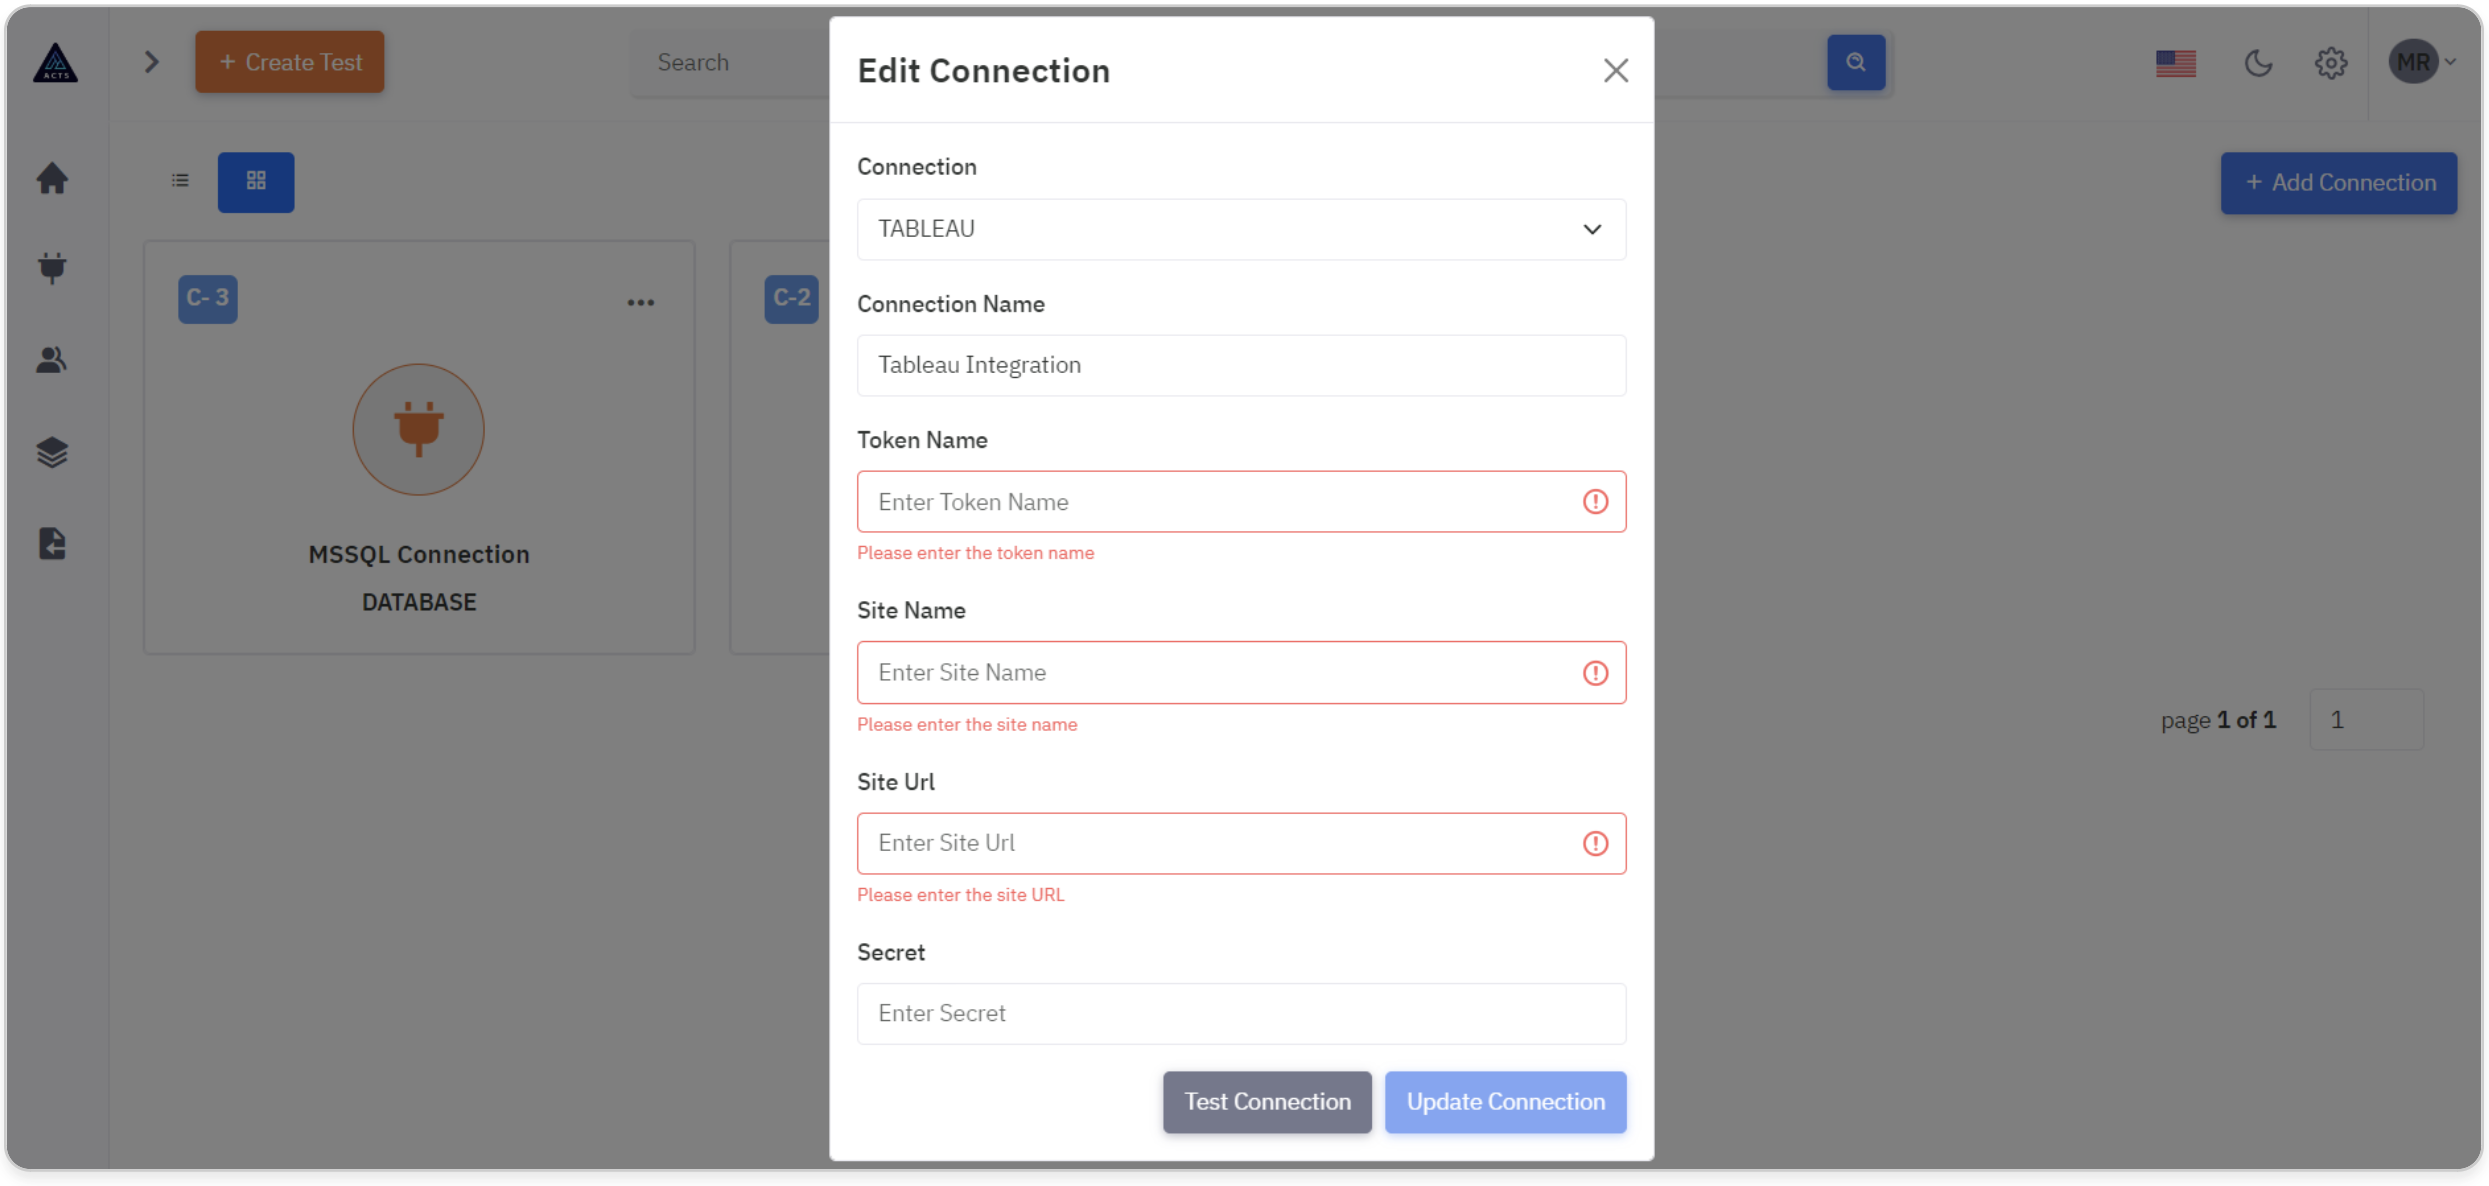
Update Connection
When editing a connection, a modal will appear with all fields pre-filled.
For security purposes, all confidential data (such as passwords or API keys) will be masked or removed, requiring users to re-enter this information.
This ensures that sensitive information is not exposed unnecessarily and enhances security measures within the application.